Parallax
You can easily create floating headers, footers, and pop-ups in Justinmind using pinned positions. Elements will normally stay in place while you simulate, but if they’re pinned, they’ll move with the scroll of the screen. Check out the examples below to learn how to use pinned elements and other parallax effects.
Pin top and bottom (sticky headers and footers)
Elements that are pinned to the top or bottom of the screen will stay in place as you scroll.
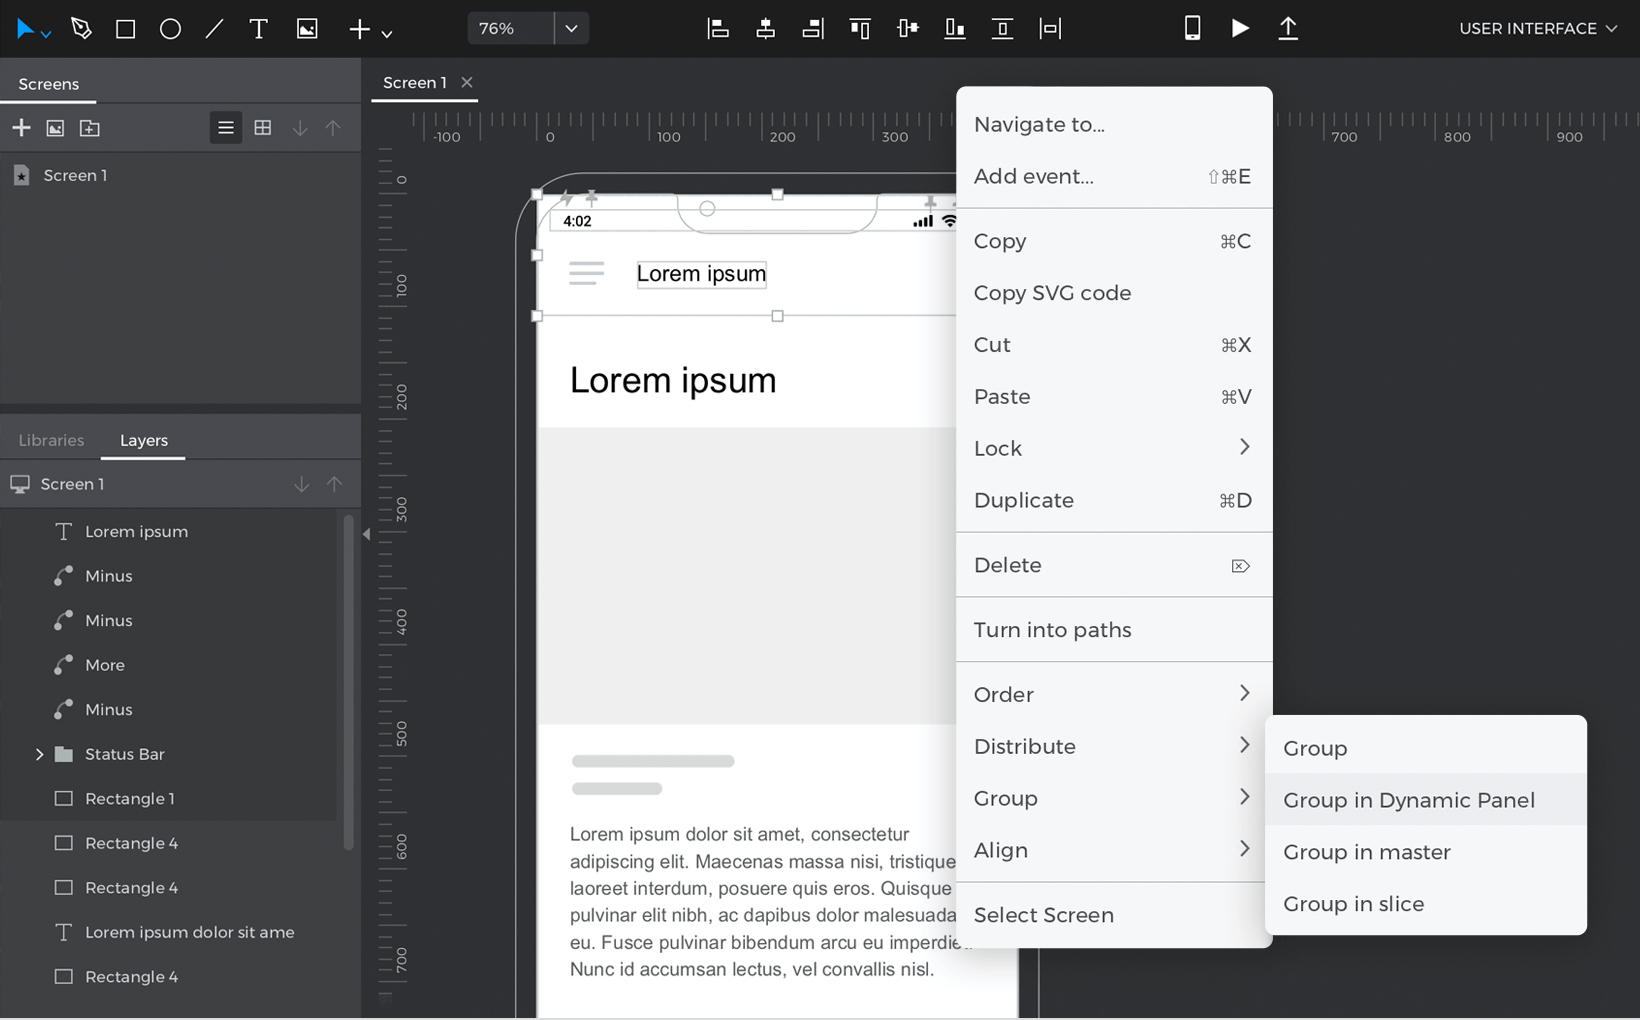
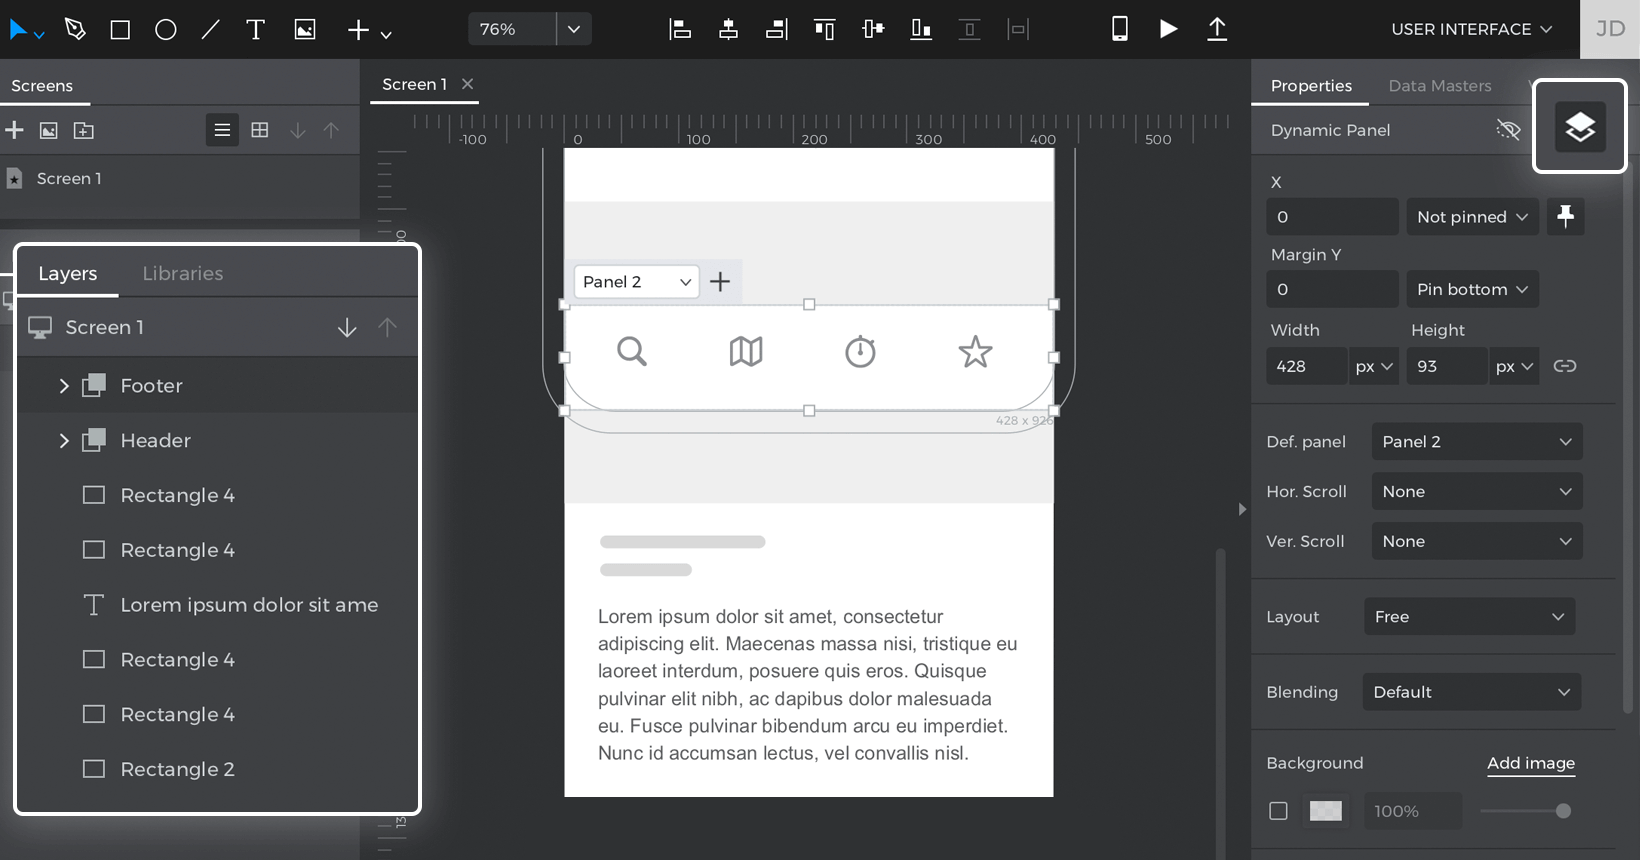
- Design a header or footer using rectangles, text, and images. Once you’re done designing, select all of the elements, right-click, go to Group, and select ‘Group in Dynamic Panel’.

This places all of the elements into a dynamic panel, which works as a container. You’ll be able to pin that dynamic panel (and all of the elements inside) to the top or bottom of the screen.Note that you won’t be able to pin a regular group itself. You’ll need to place multiple elements into a dynamic panel in order to pin them.
If you’re only using one element as a header/footer, you won’t need to group it in a dynamic panel.
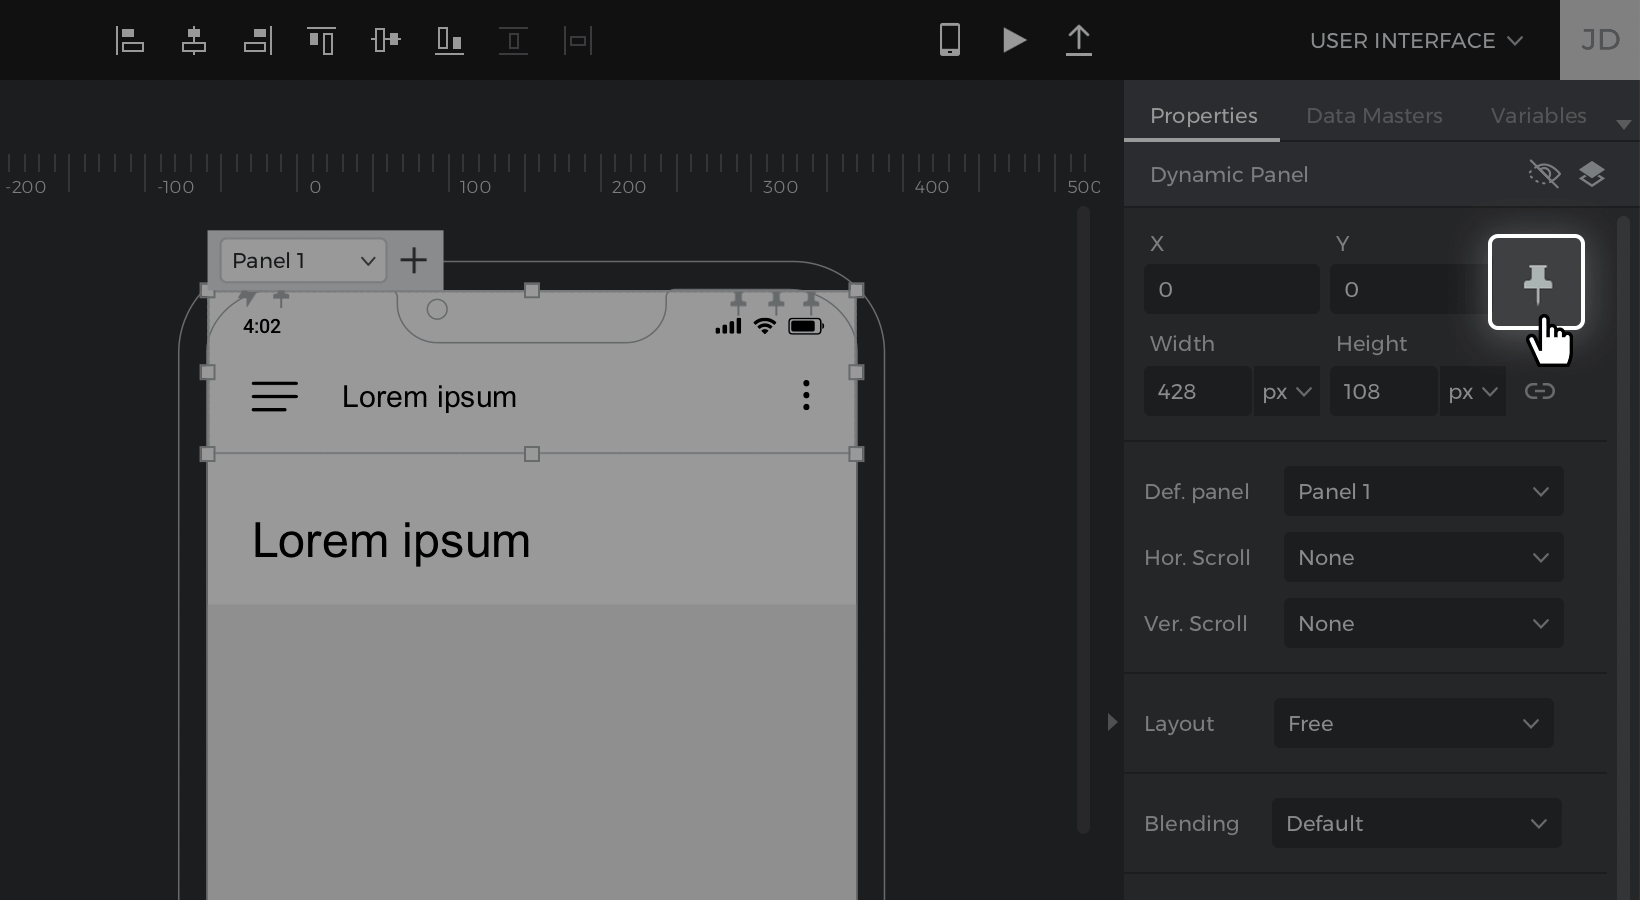
- With the header or footer selected, go to the Properties palette. Click on the ‘Pin’ button next to the X and Y positions for the header.

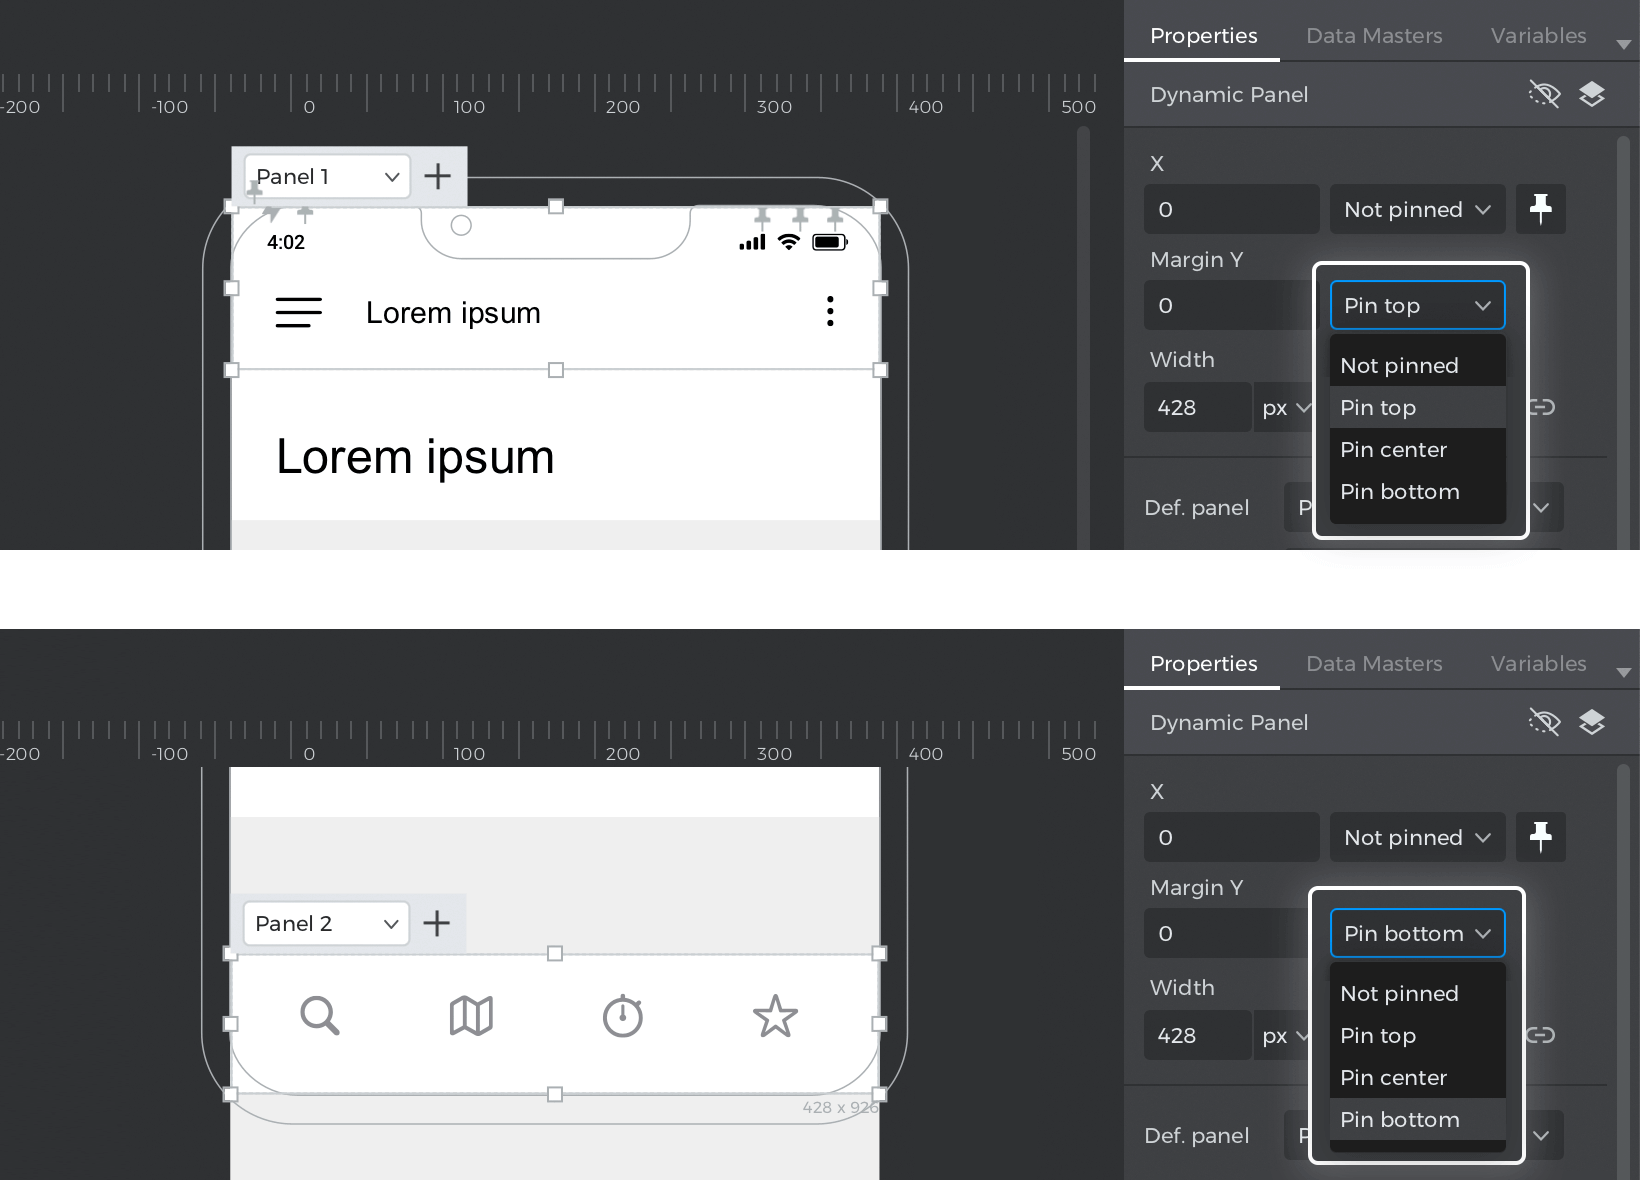
- You’ll now see two dropdowns appear. Click on the one next to the Y position and select ‘Pin top’ to create a pinned header, and select ‘Pin bottom’ to create a pinned footer.

Tap the ‘Play’ button to simulate your project and check out how your header and footer will stay in place on the screen as you scroll.
Pinned center (fixed pop-up)
You can combine pin positions with events to create interactive and realistic pop-ups.
- Build a pop-up with rectangles, text elements, and an input text field. Select all of the elements in the pop-up, right-click, go to Group, and select ‘Group in Dynamic Panel’.
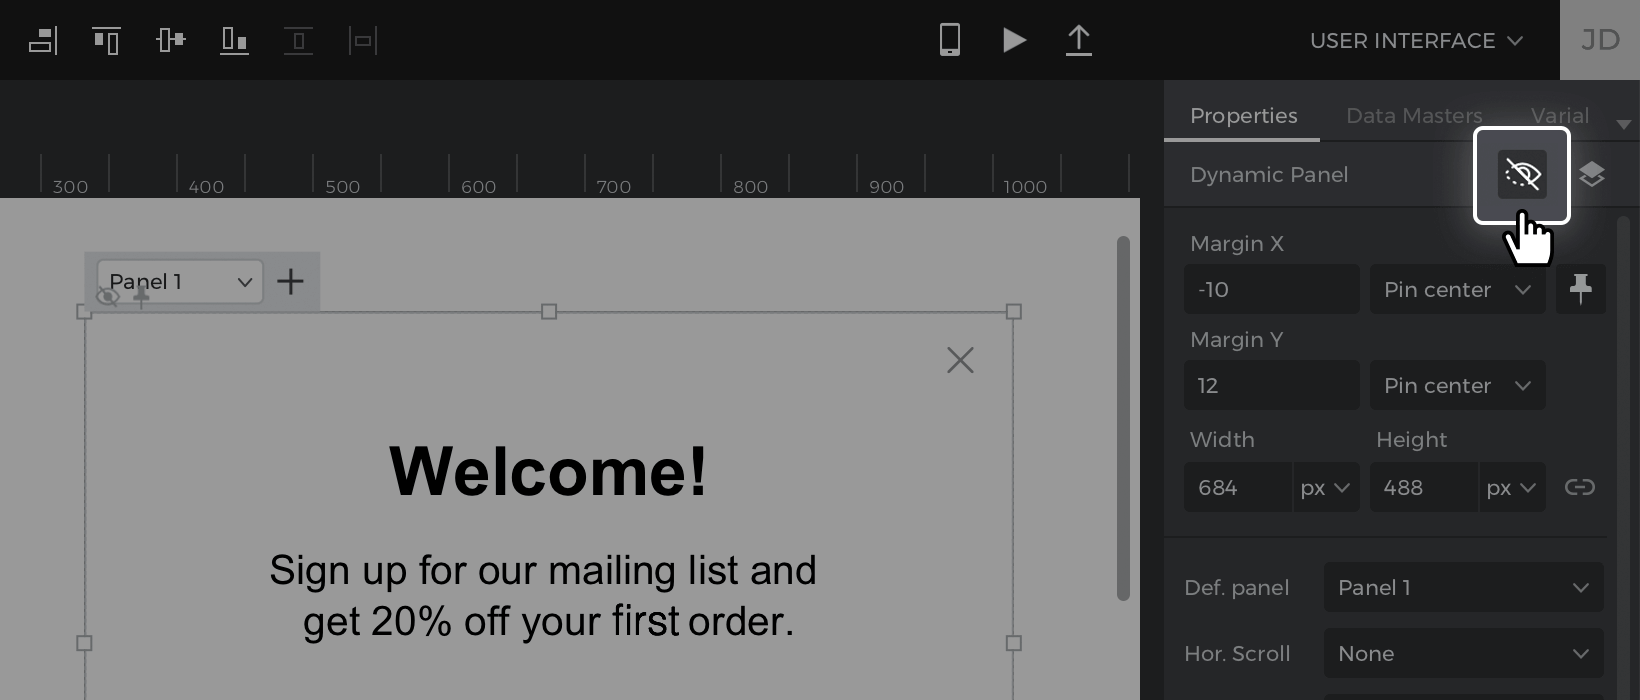
- Go to the Properties palette and click on the ‘Pin’ button to open pin position options. In both the X and Y dropdowns, select ‘Pin center’. Now, the pop-up should be pinned to the horizontal and vertical centers of the screen as you scroll.
- With the pop-up still selected, click the ‘eye’ button in the Properties palette, which will hide the pop-up by default during simulation.

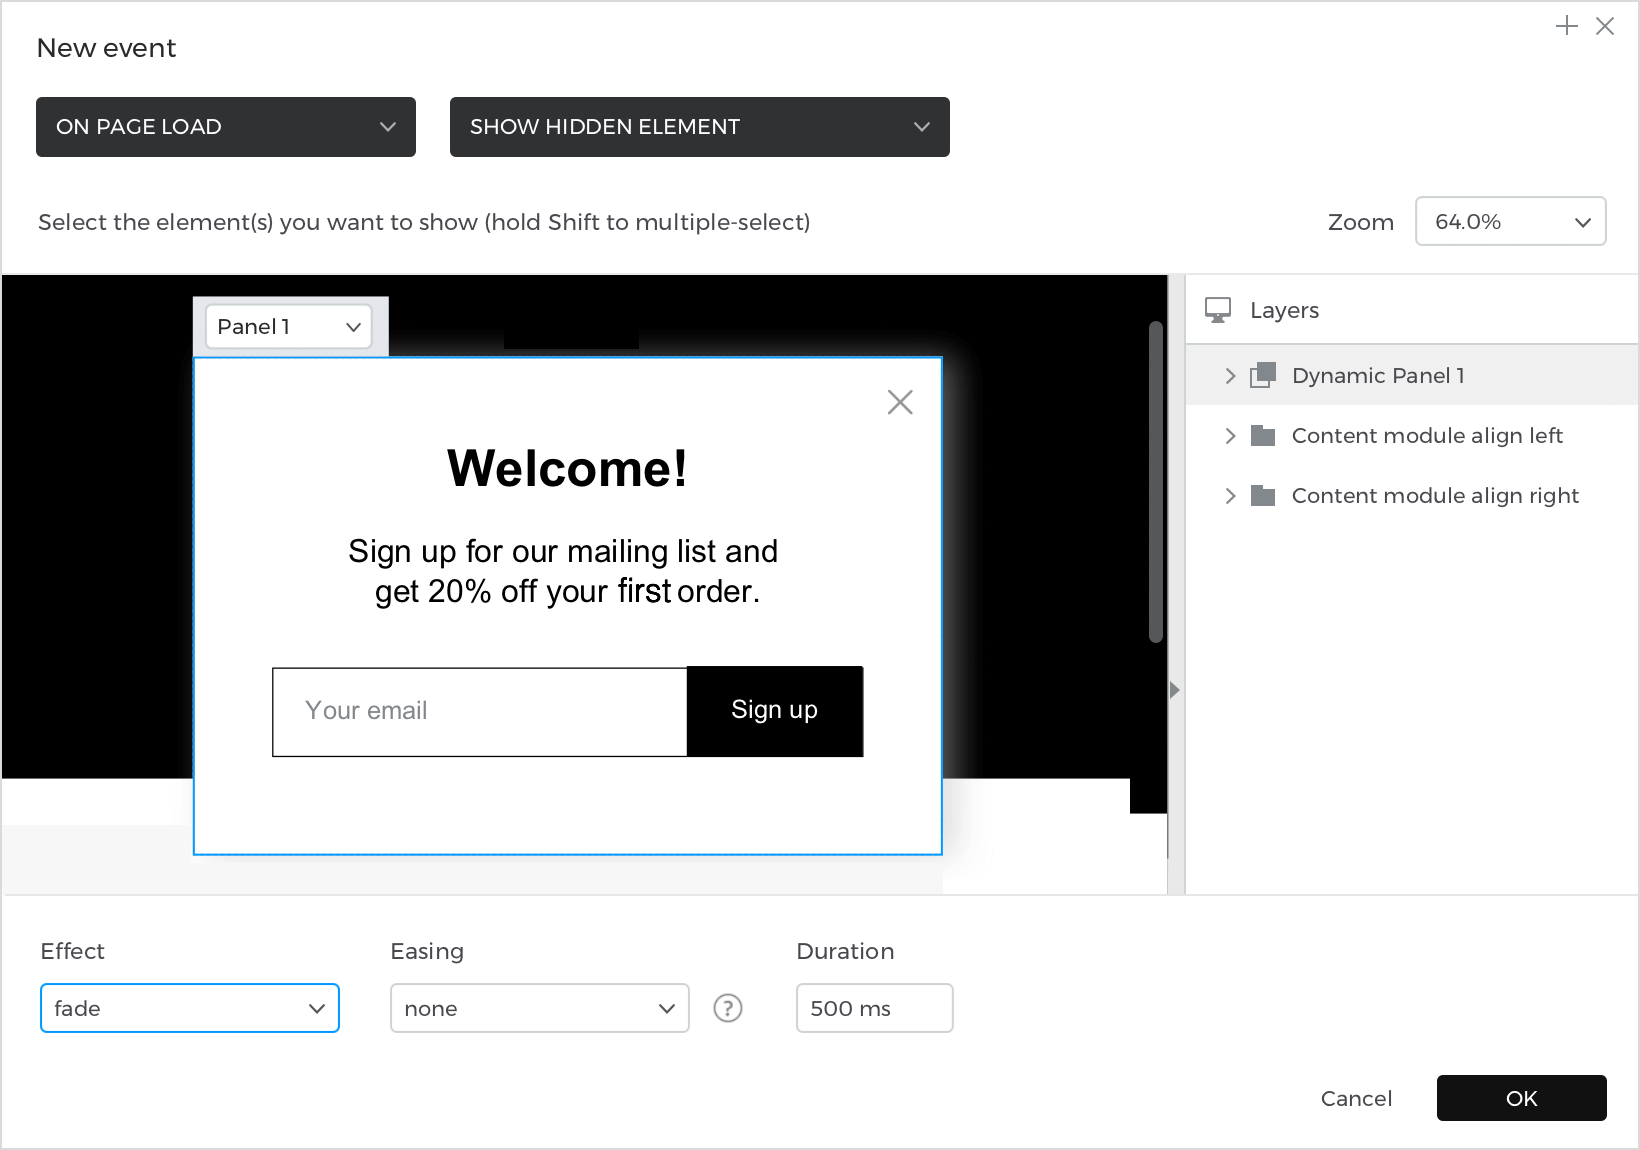
- You can now create an event to show the pop-up with a fade in effect when the page loads. Create an On Page Load + Show element event, selecting the Pop-up to show. Add a ‘fade’ effect and click ‘OK’ to finish building the event.

Tap the ‘Play’ button to simulate your project and see how your pop-up fades into view when the screen loads and stays pinned to the center of the screen as you scroll.
Parallax effects
In this example, you’ll use the parallax widget library to build create fade, slide, and floating parallax effects.
After you’ve downloaded the library, import it into your Libraries palette(link to UI libraries tutorial).
To start, build a Web project and increase its height to around 4000px. Place a header at the top of the screen and a footer at the bottom of the screen.
Fade in hero image
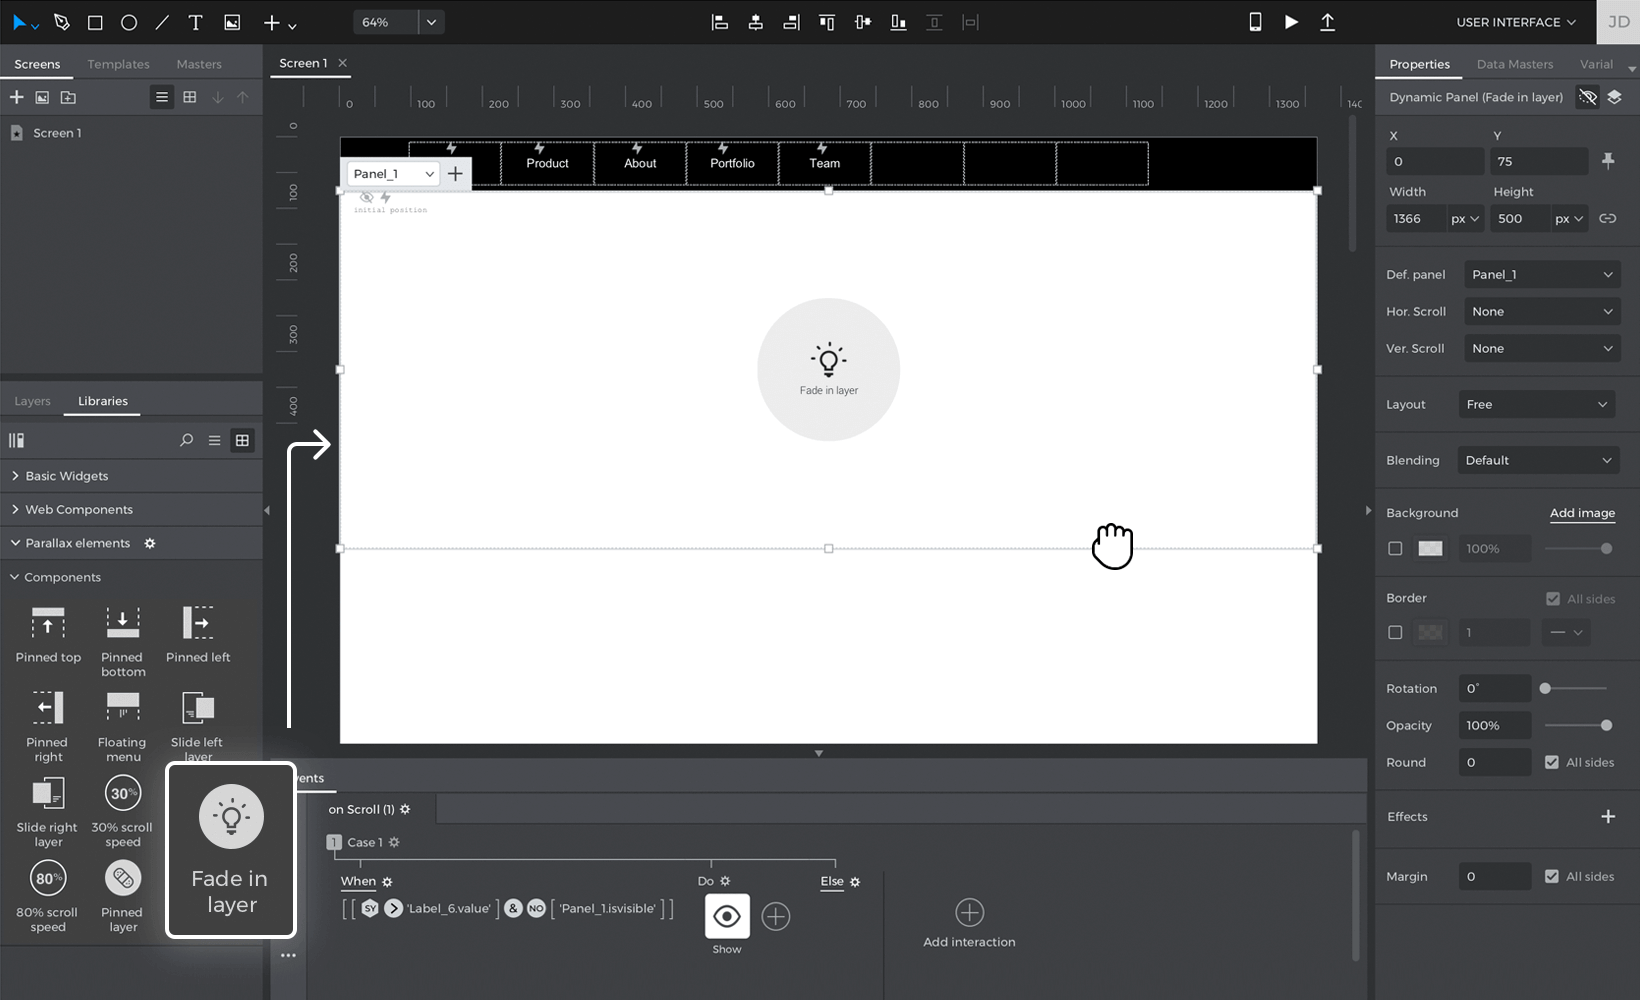
- Drag the Fade in layer element from the parallax elements library to top of the Canvas. Resize it until it takes up the whole width of the screen and is about 700px long.

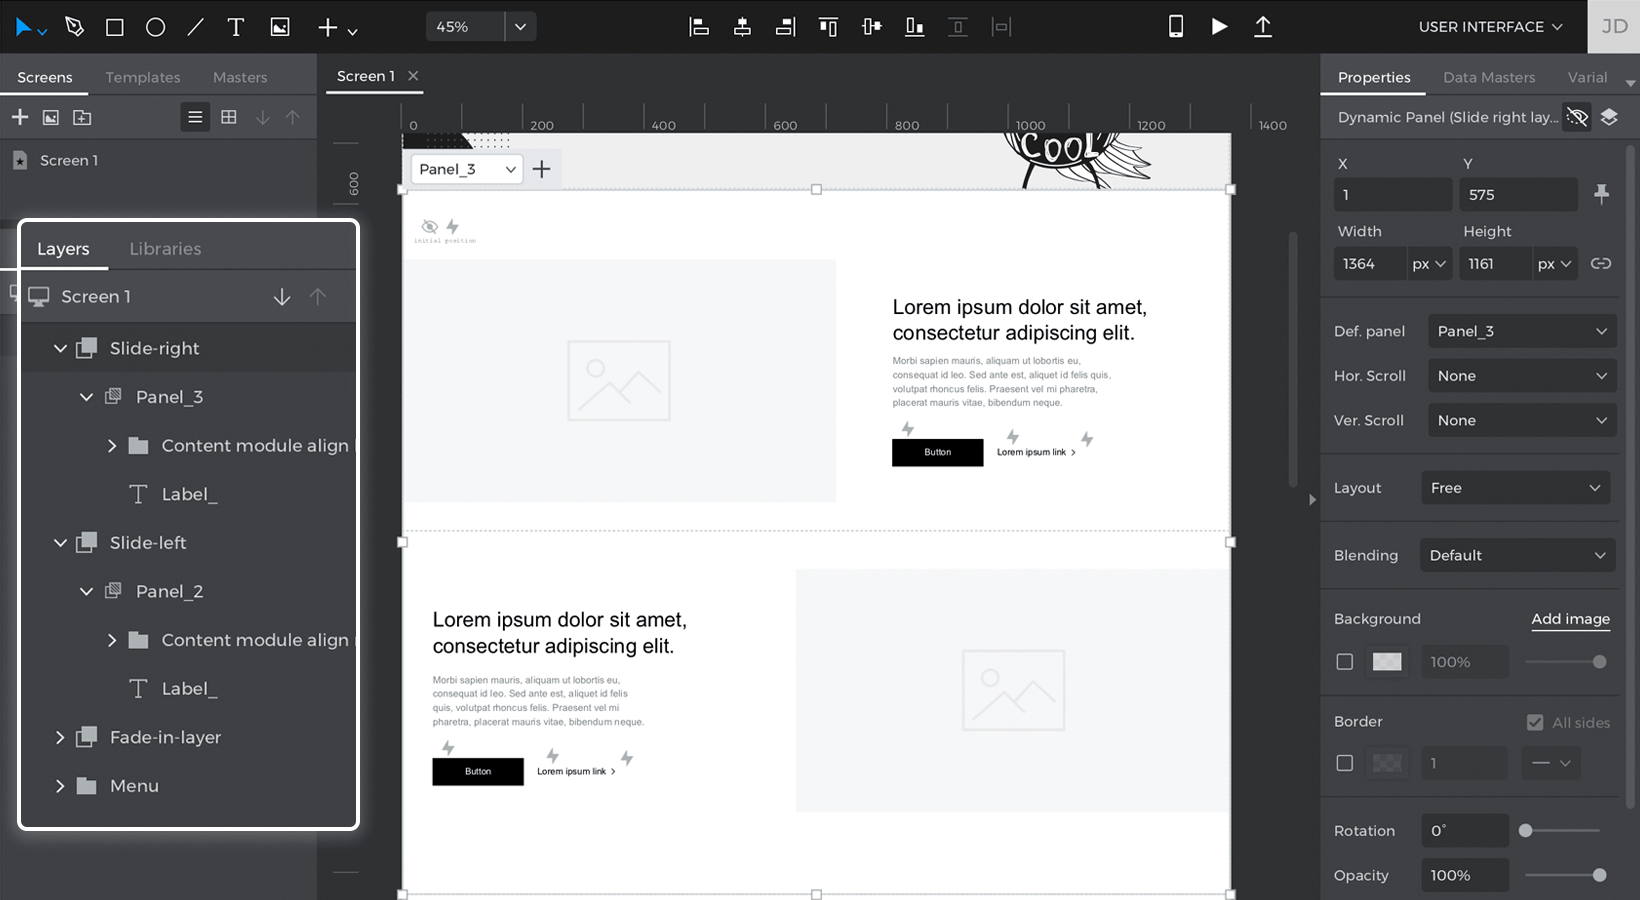
- Take a closer look at the element on the Canvas. You’ll see that it’s a dynamic panel that has a hidden text element labeled “initial position” and a graphic inside.You can go ahead and delete the graphic, but make sure to leave the “initial position” text.The fade in effect works by showing the dynamic panel when the screen’s scroll is more than the “initial position” text’s position. Since it’s placed at the top of the screen, the event will be triggered as soon as you start scrolling.
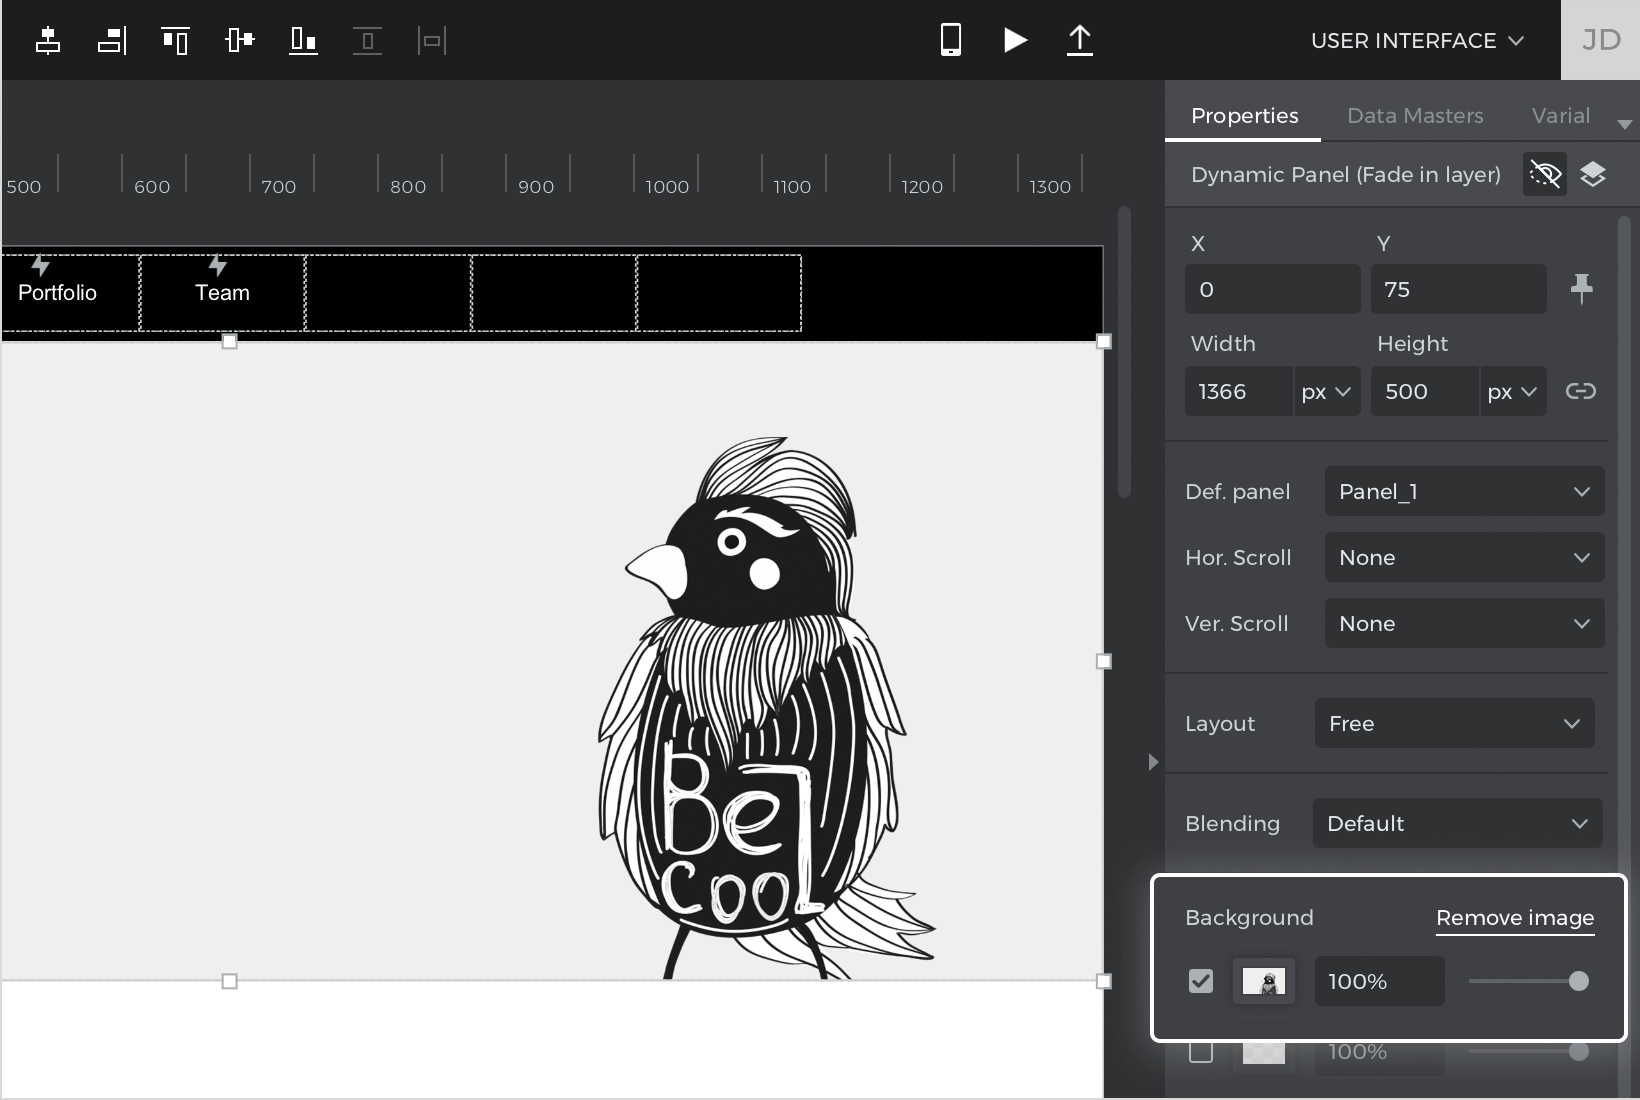
- To match the example, add a background image to the dynamic panel in the Properties palette.

Click the ‘Play’ button to simulate your project. As soon as you start scrolling, the hero image should appear.
Slide in effects
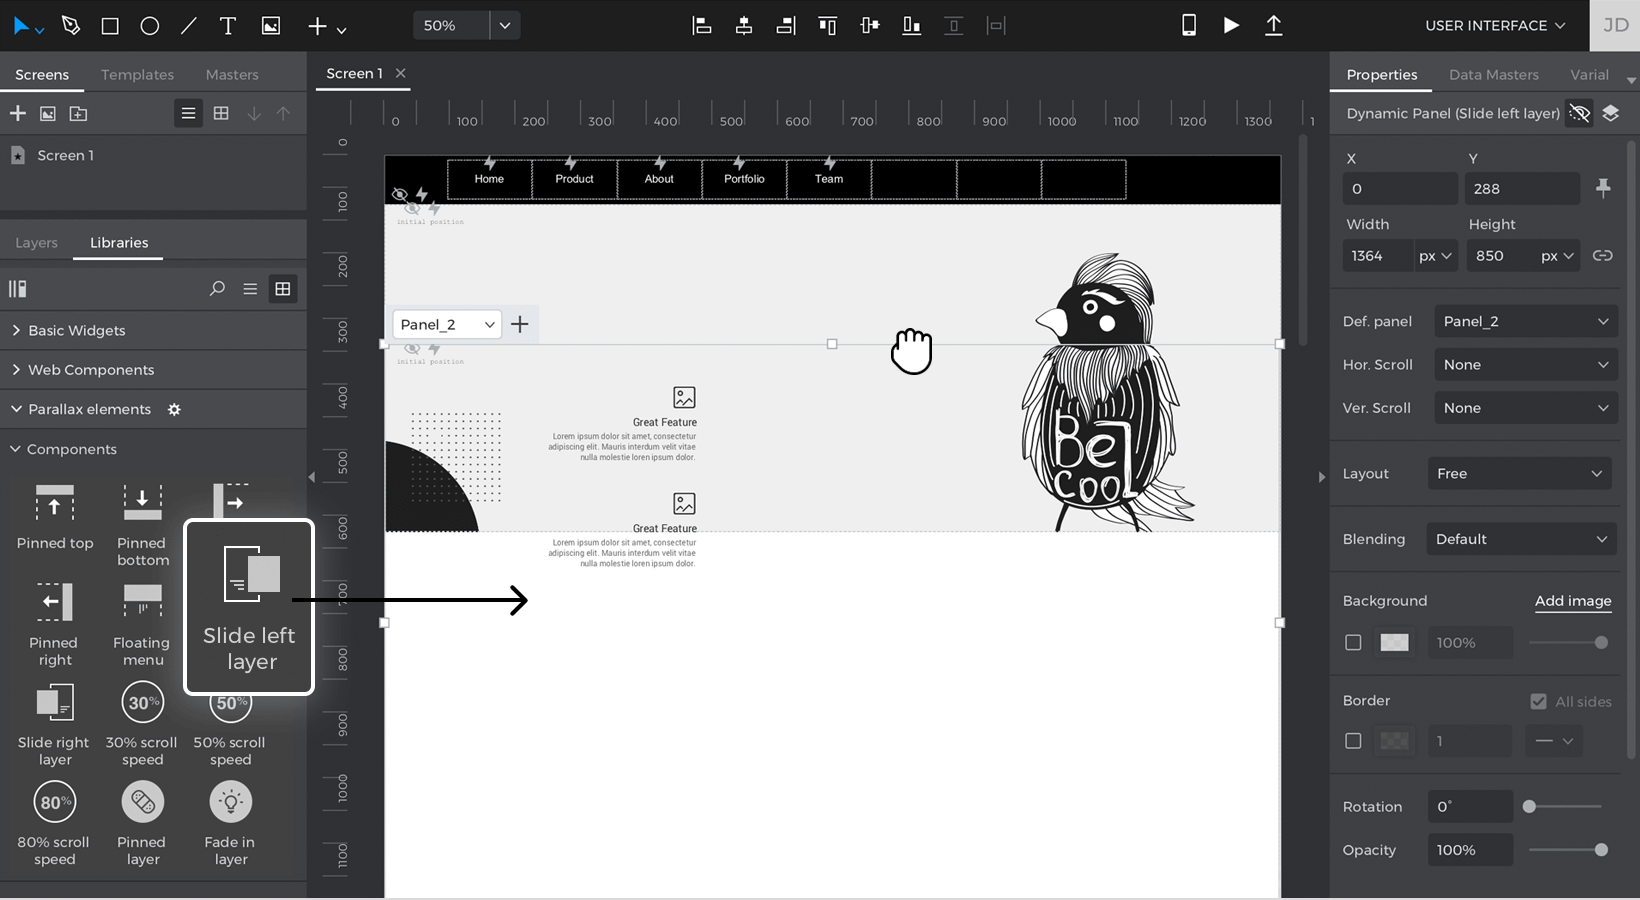
- Drag the Slide left layer from the parallax library to the Canvas, placing it on top of the hero image. You’ll see that it also contains the “initial position” text and some graphics.Resize the panel until it takes up the whole width of the screen and is about 850px in length.

Like the fade in layer element, the slide left effect works by showing the dynamic panel whenever the screen’s scroll is greater than the “initial position” text.The “initial position” text is placed where the hero image starts, so you’ll see this layer slide in from the left when you scroll past the hero image.
- Delete the graphics but leave the “initial position” text. Hold Command (on Mac) or Control (on Windows) to place elements inside the dynamic panel. To match the example, add three Text elements and a Rectangle and style them as preferred.
- You’ll now add an element that will slide in from the right. Place the Slide right element from the parallax library on the Canvas where the hero image ends.Resize it to be the screen’s width and 850px in length. You can remove the graphics inside.Place three Text elements and a Rectangle inside the panel.

Click the ‘Play’ button to simulate your project. You’ll see the hero image appear and the slide left panel will slide in shortly after. Keep scrolling and you’ll see the slide right panel appear next.
Pin elements while scrolling
- Place a Rectangle on the Canvas below the Slide right element and resize it to take the entire width of the screen. Add a background image to the Rectangle to match the example.
- With the rectangle still selected, go to the Events palette and click ‘Add event’.
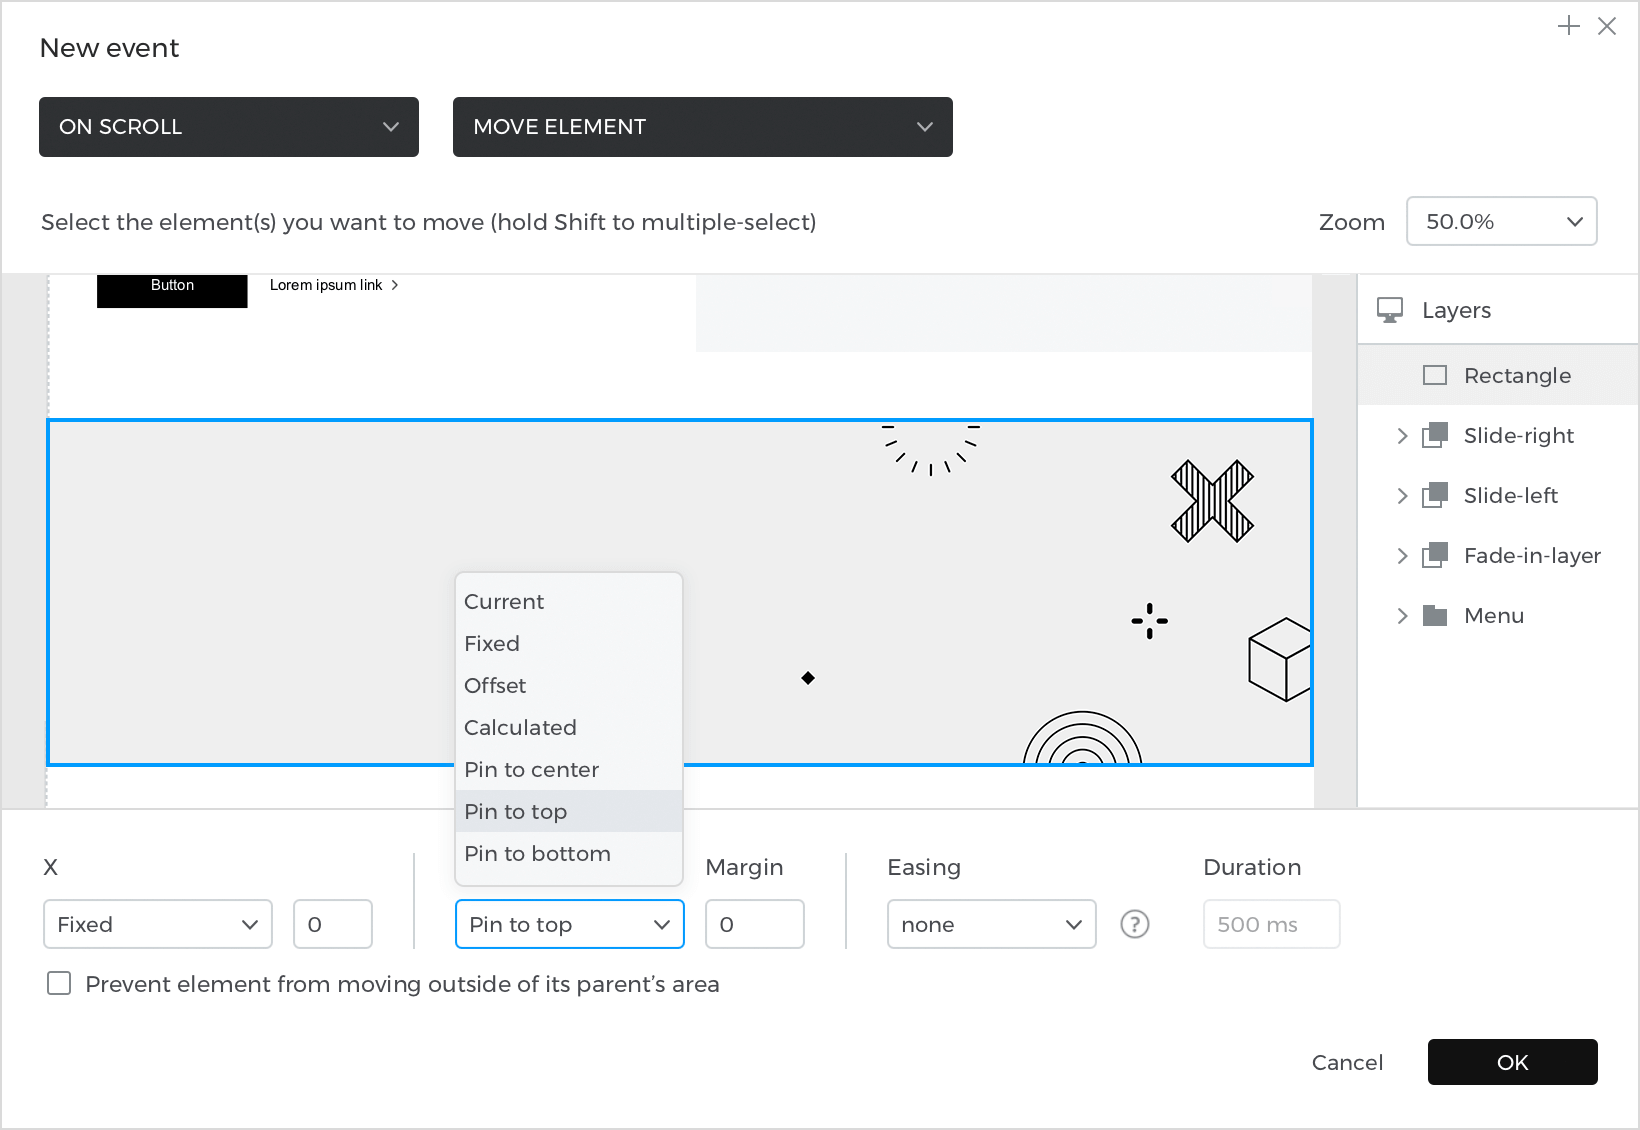
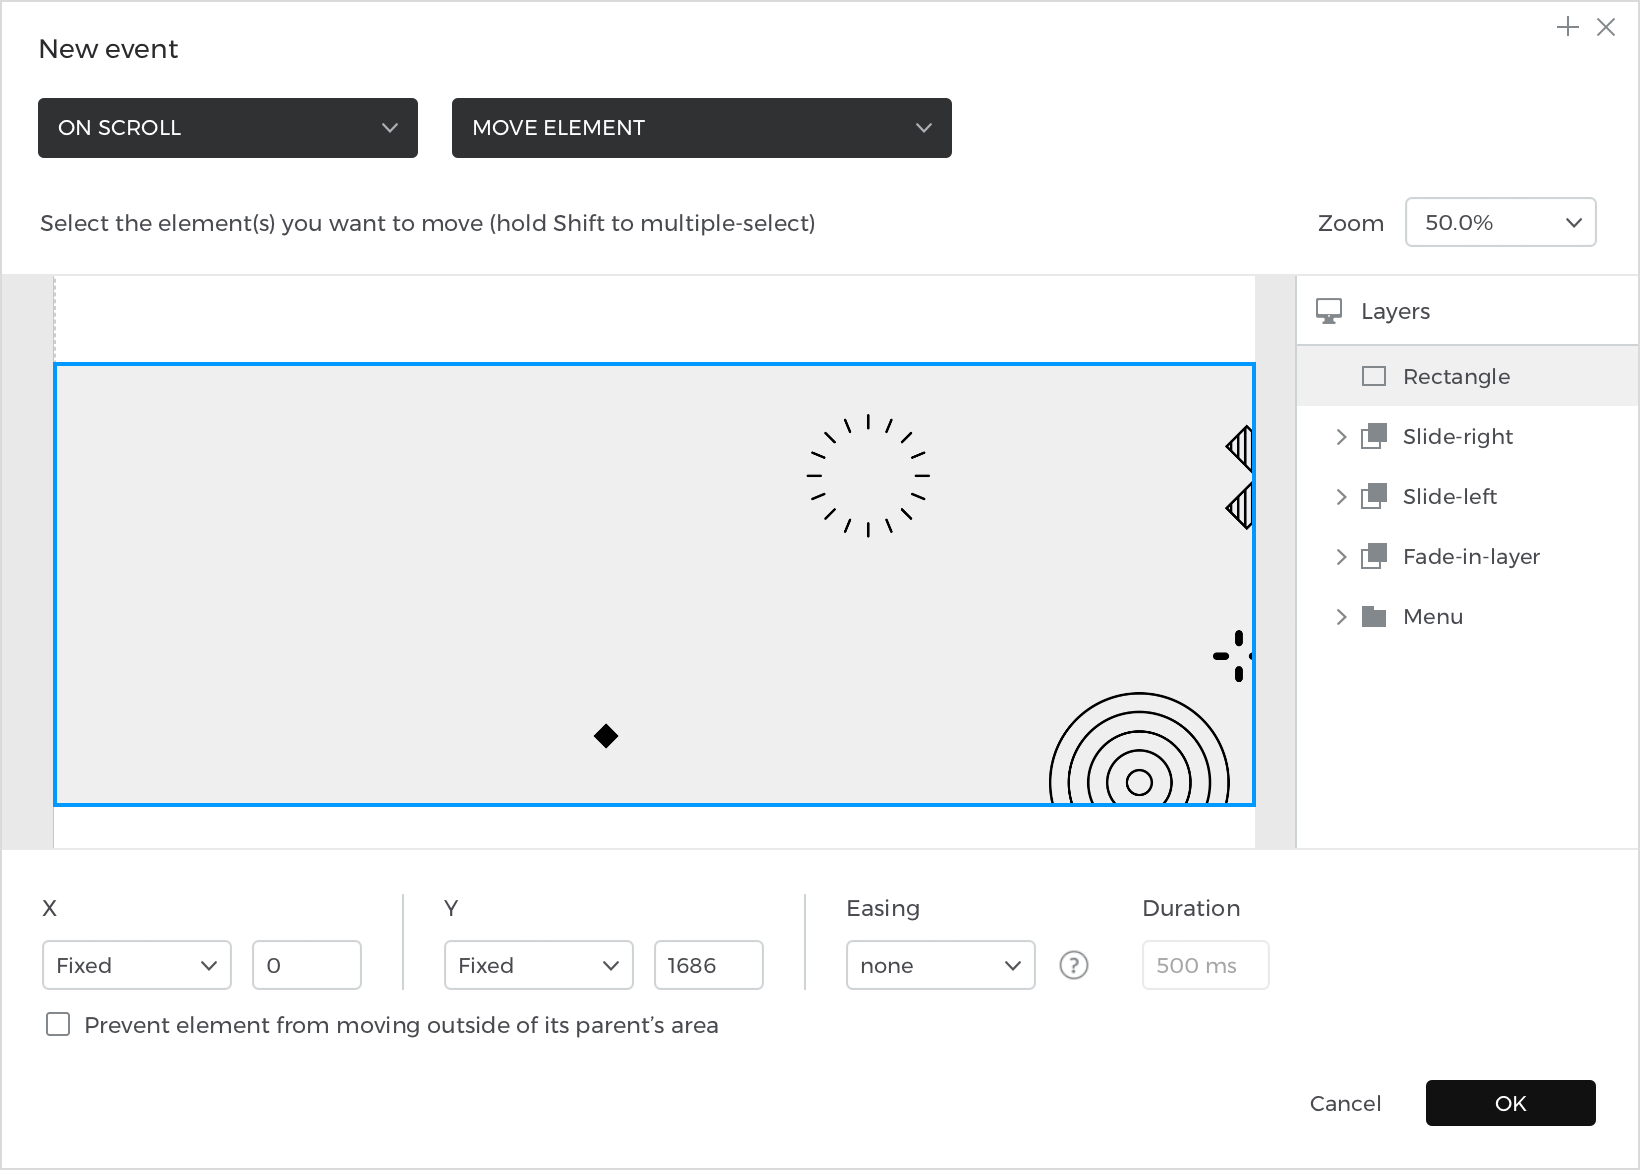
- Create an On Scroll + Move event. Select the rectangle as the element to move. You’ll see two dropdowns appear below where you can define where you want the rectangle to move. Click on the ‘Y’ (vertical) dropdown and select ‘Pin to top’. Click ‘OK’ to finish building the event.

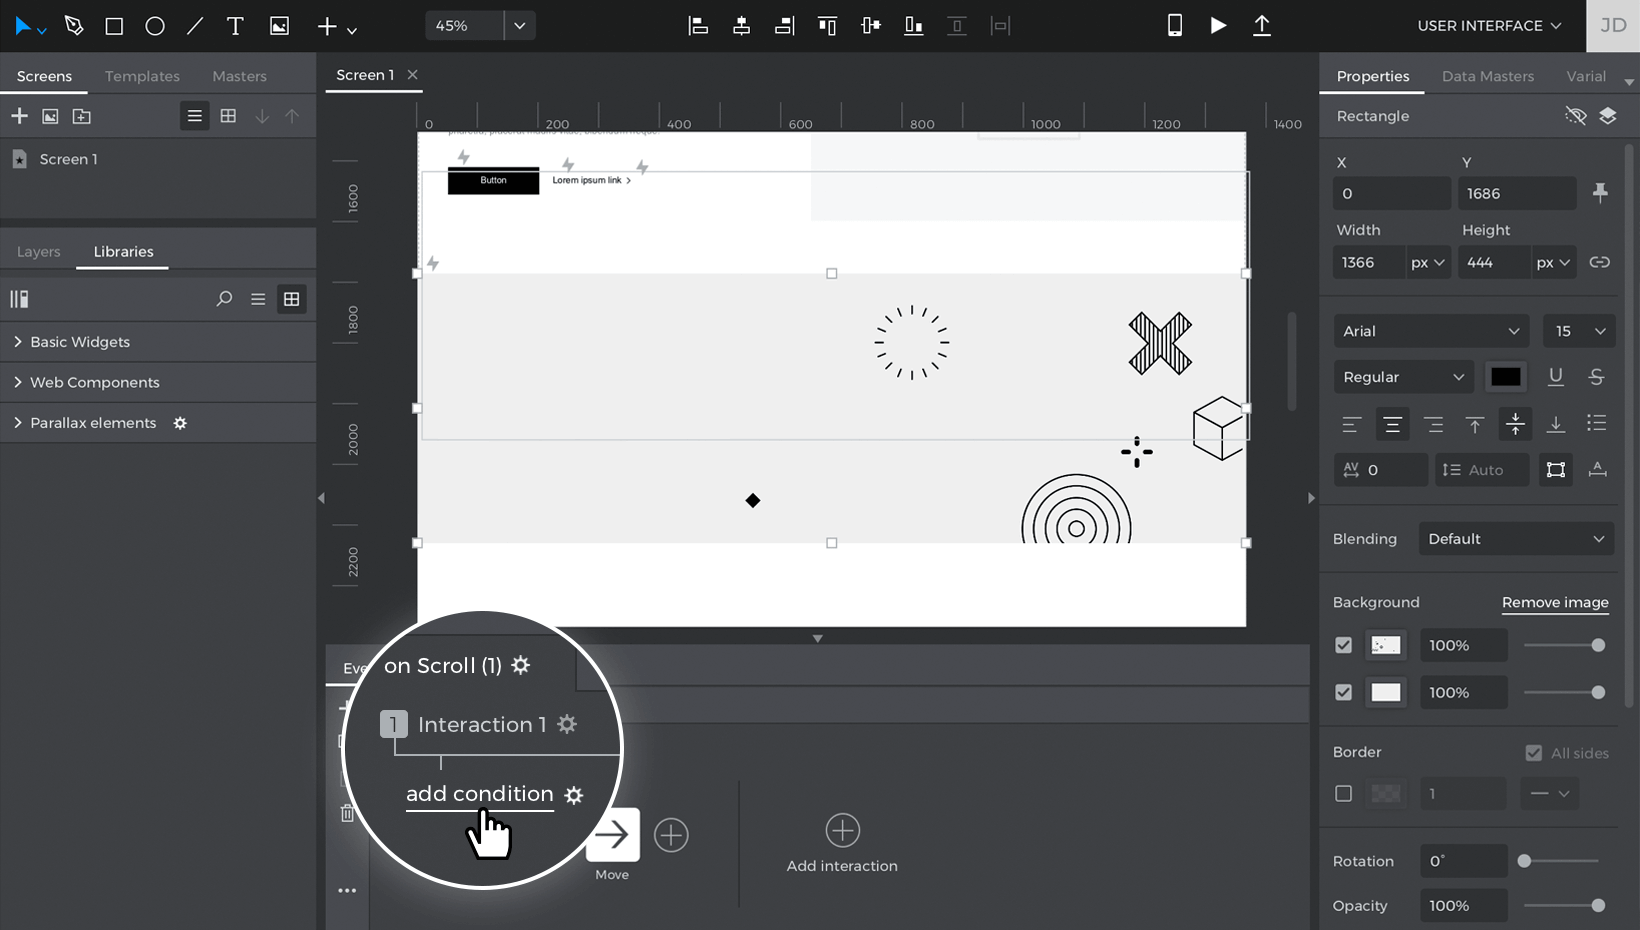
- Back in the Events palette, click the ‘Add condition’ text link above the event you just created.

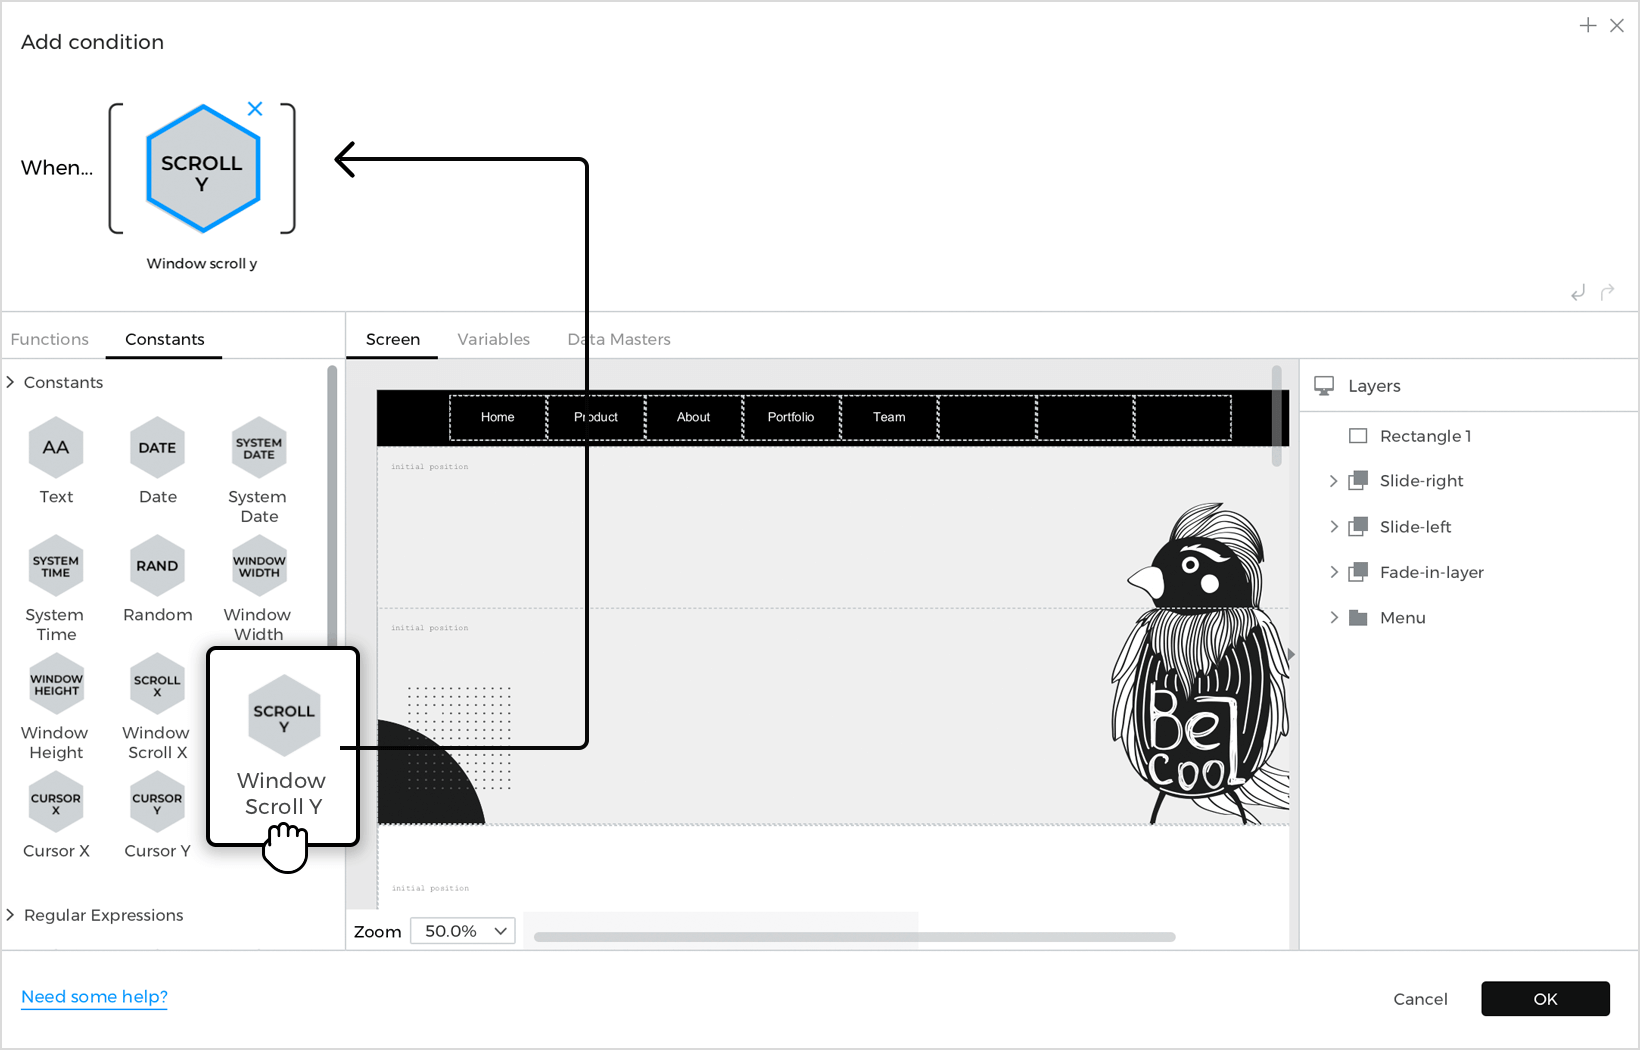
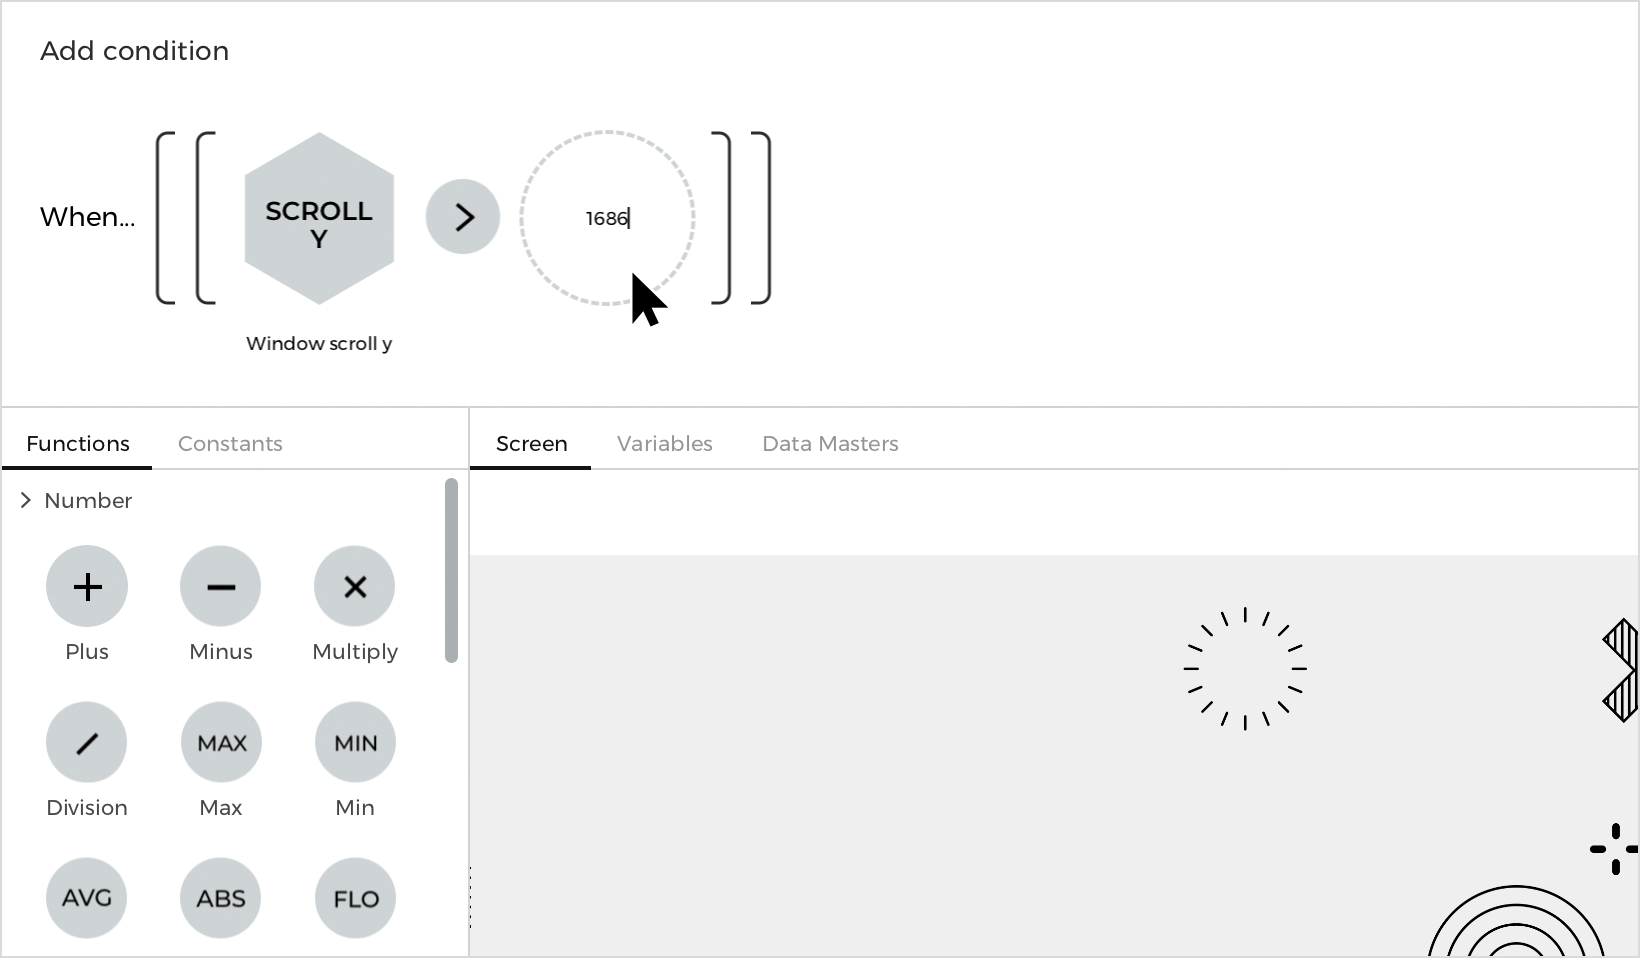
To build the condition:- a. Go to the Constants tab and drag the Window Scroll Y (Scroll Y) constant to the open space in the expression.

- b. Go back to the Functions tab and scroll down to the Logic section. Drag the Greater (>) function to the expression.
- c. You’ll see a new open space appear in the expression. Click into that space and type in the Y (vertical) position of the rectangle. In this example, the rectangle is positioned at 1686px on the Canvas.

- d. Click ‘OK’ to finish building the condition.This event and condition will pin the rectangle to the top of the screen when you scroll past 1686px on the Canvas.
- a. Go to the Constants tab and drag the Window Scroll Y (Scroll Y) constant to the open space in the expression.
- Click the ‘Else’ text link below the event you just created in the Events palette. Create an On Scroll + Move event. Select the rectangle as the element to move. Leave the ‘X’ and ‘Y’ dropdowns as fixed with their default values and click ‘OK’ to finish building the event.

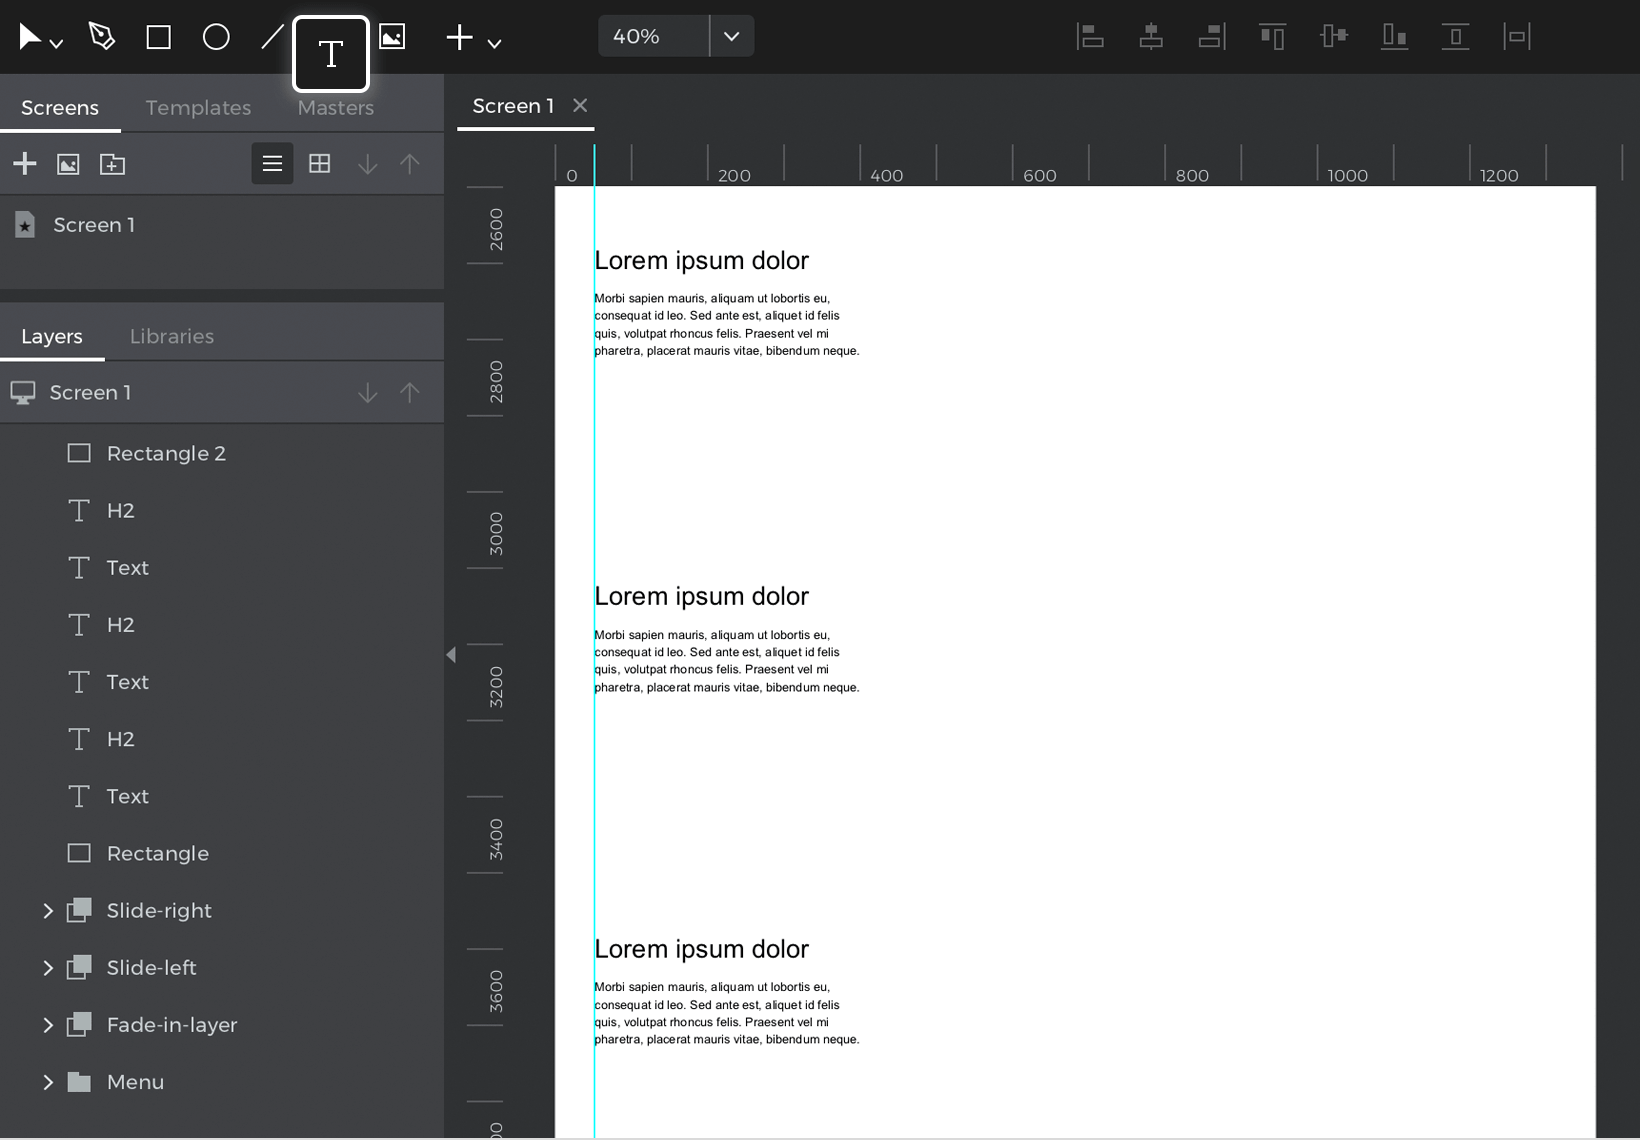
This event will move the rectangle back to its original position whenever the screen’s scroll is less than 1686px. - Below the rectangle, add two text elements and style them as preferred. Copy and paste them twice and distribute them spaced down the Canvas. Make sure they’re above the rectangle in the Layers palette.

Click the ‘Play’ button to simulate your project. Scroll through the project and you’ll see the rectangle stay at the top of the screen while the text elements pass over it.
