Ride-sharing apps help people get from point A to point B at the tap of a finger. Here is how to prototype your very own
Apps like Uber, Lyft, Deliveroo and Fiverr have helped create a big market for freelancers, self-styled solopreneurs and side gig enthusiasts.
Ride-sharing apps in particular help give people a stream of income that requires very little skill: just a driving licence and a car with four doors.
Ride-sharing apps have simple user interfaces too, with only a small number of screens. How difficult can it be to prototype this sort of thing? Not very! With that in mind, why not make our own ride-sharing app in Justinmind’s prototyping tool?
There are eight steps to follow and each step is broken down into standard ride-sharing app patterns.
Let’s make it.
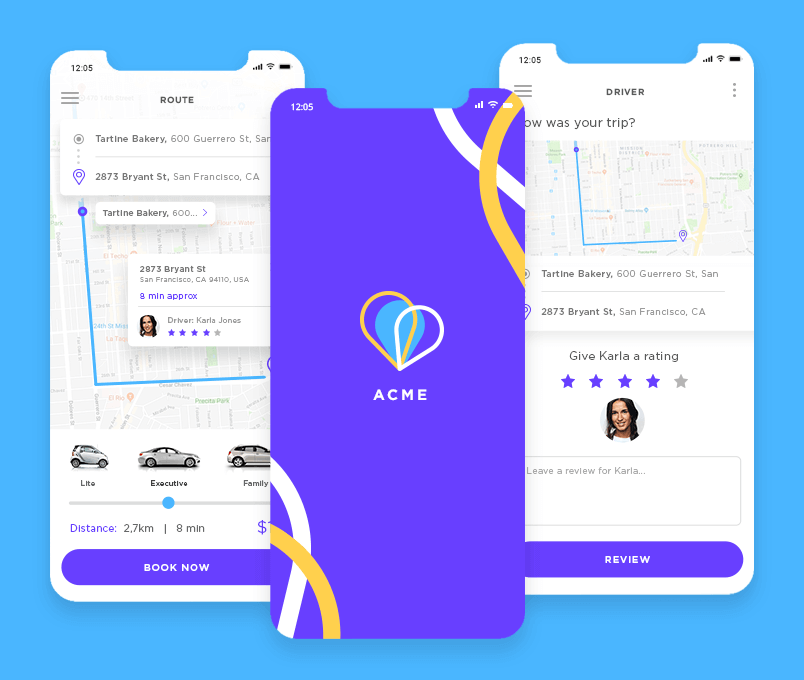
Step one: Download Justinmind
To get started, download Justinmind. Open it and create a new mobile prototype. Our example is for iPhone X.
Don’t worry – we have lots of pre-installed and fully customizable widgets for both iOS and Android so no matter the operating system, you can design for it. If you want to study the theory before jumping into this tutorial, we recommend this post on low and high-fidelity prototypes.
Oh and the iPhone X? You’re covered! We’ve got it all in our UI kits.
Step two: Create your screens
In our ride-sharing app, we have 3 screens. They are:
- Splash screen
- Book a cab
- Review
Our app also features a vertical sliding menu, which we’ll show you how to build as well.
In Justinmind,’s prototyping tool create your own screens by clicking on the ‘+’ symbol in the Screens palette. Name them to match our three screens in the bulleted list above.
Step three: Make a Template for repeated content
Our app has a vertical sliding menu that is accessed on every screen. We can add this icon to each individual screen or save ourselves time by creating a Template. A Template means you can control the styles and apply global changes to your UI elements without having to go to each individual screen. What’s more, any Events you create in your template will be replicated too.
To create a Template, go to the Templates palette and click the ‘+’ icon. Now you can create the template content on the canvas. In this case, add a menu icon widget and a status bar widget to the top of the screen.
You can assign your templates to your screens from the Properties tab of each screen you’ve made.
Step four: Add a slide menu to your Template
Now we’ll add the sliding menu part of our menu widget icon using Events and a Dynamic Panel.
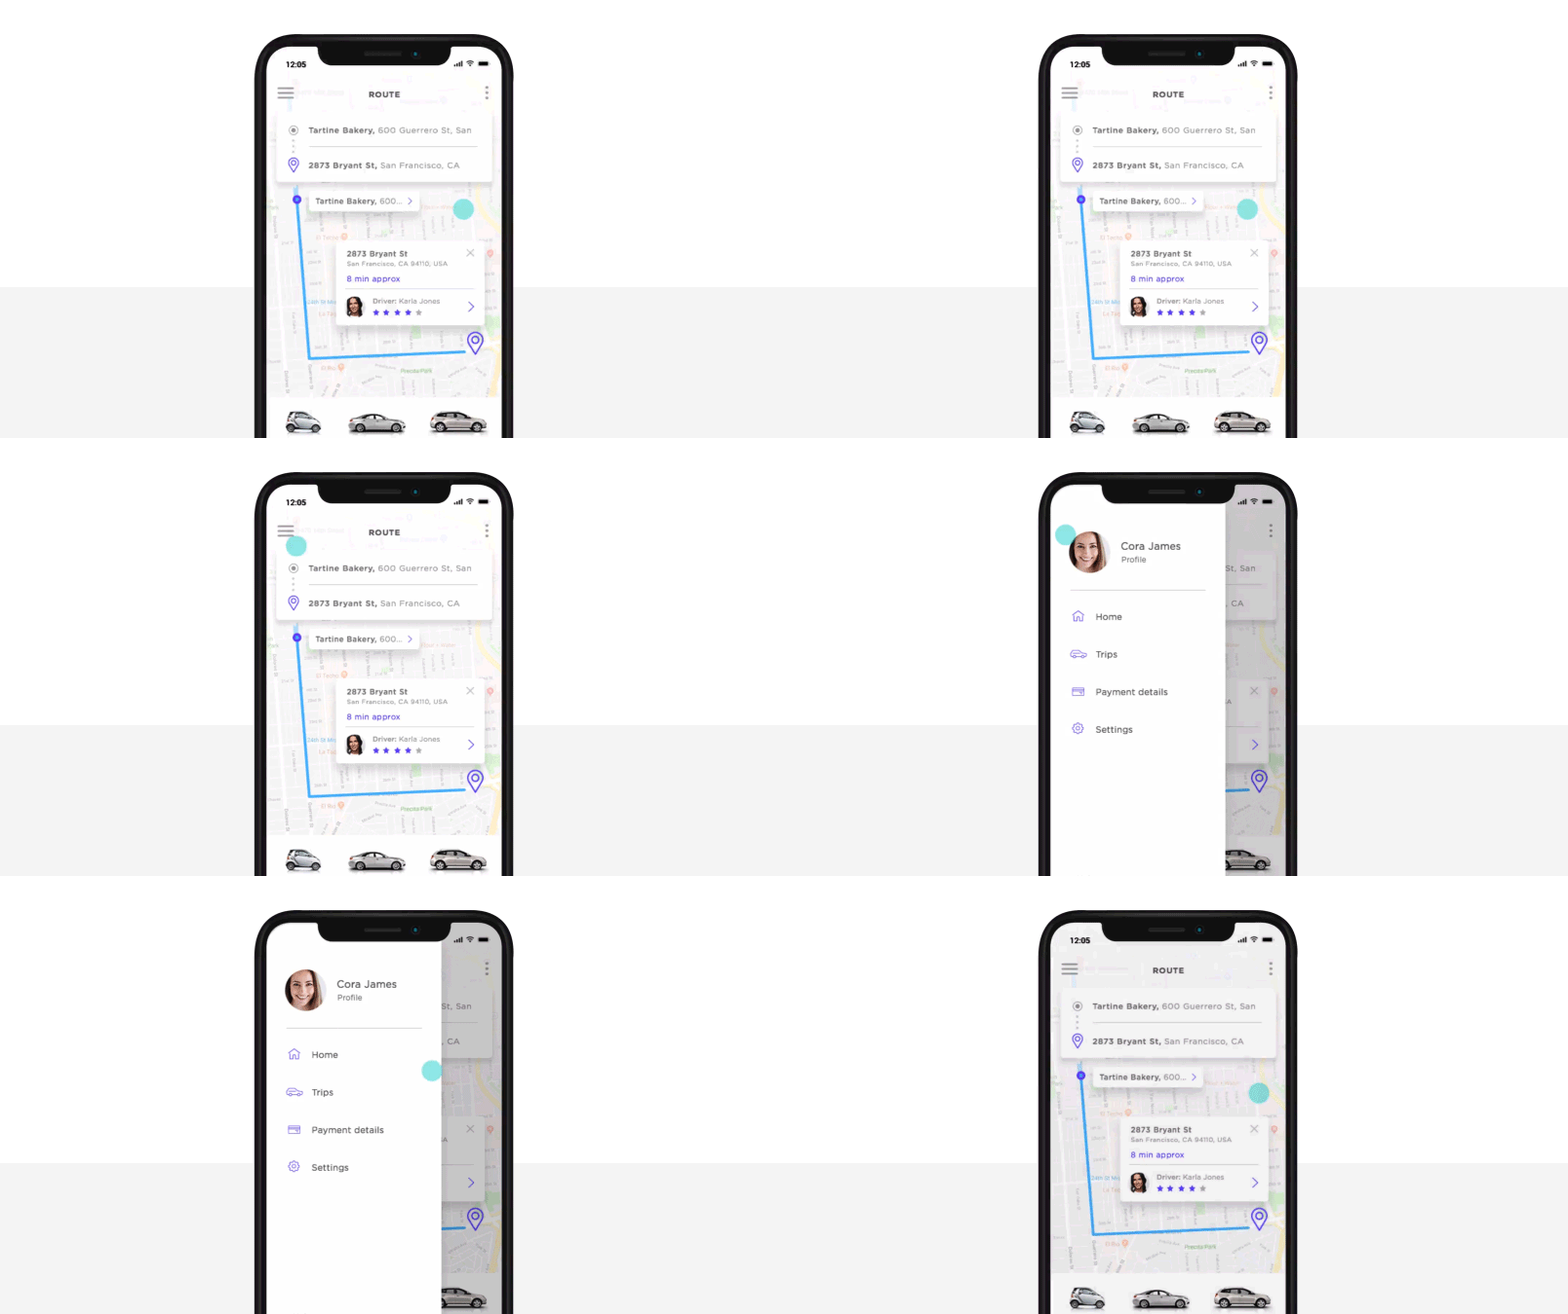
In your Template, drag a Dynamic Panel to the canvas. This will be the container for the content. Make sure it is placed just to the side of your device and is the same size as the device. Add your content to the panel. We’ve added a user avatar and navigation links.
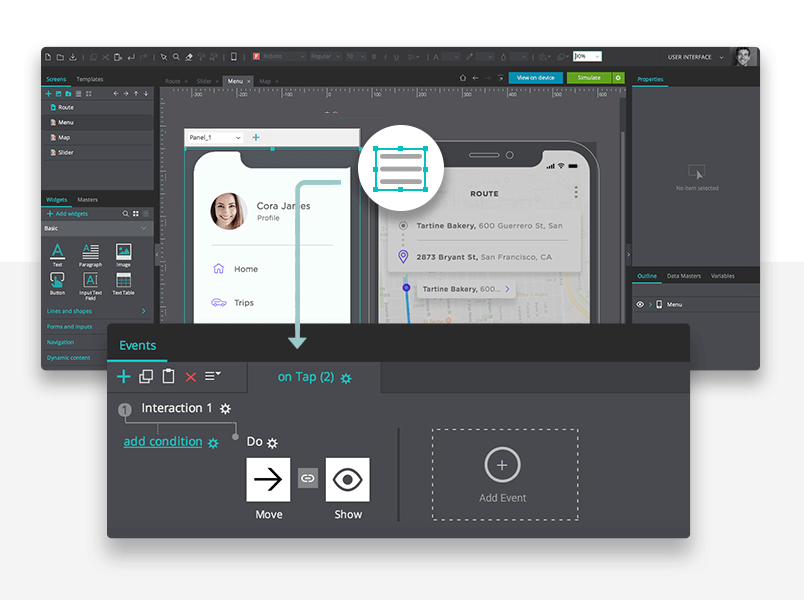
Click the menu icon widget you placed on the screen. Add an “On Tap” + “Move” event and select the Dynamic Panel from the Outline palette. Change the X position to 305 pixels, select “easeInOutQuad” from the “Easing” drop-up and enter 3000 in the duration input field. Click OK.
Follow this easy-to-understand tutorial on slide menus, if you want to learn more.
Step five: Add an interactive map
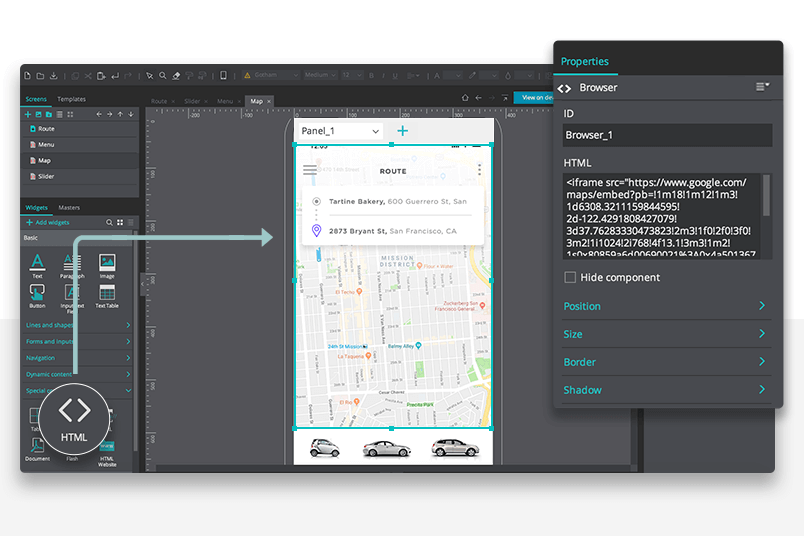
Using a map is a common pattern in ride-sharing apps. We can replicate this map in Justinmind using the HTML widget.
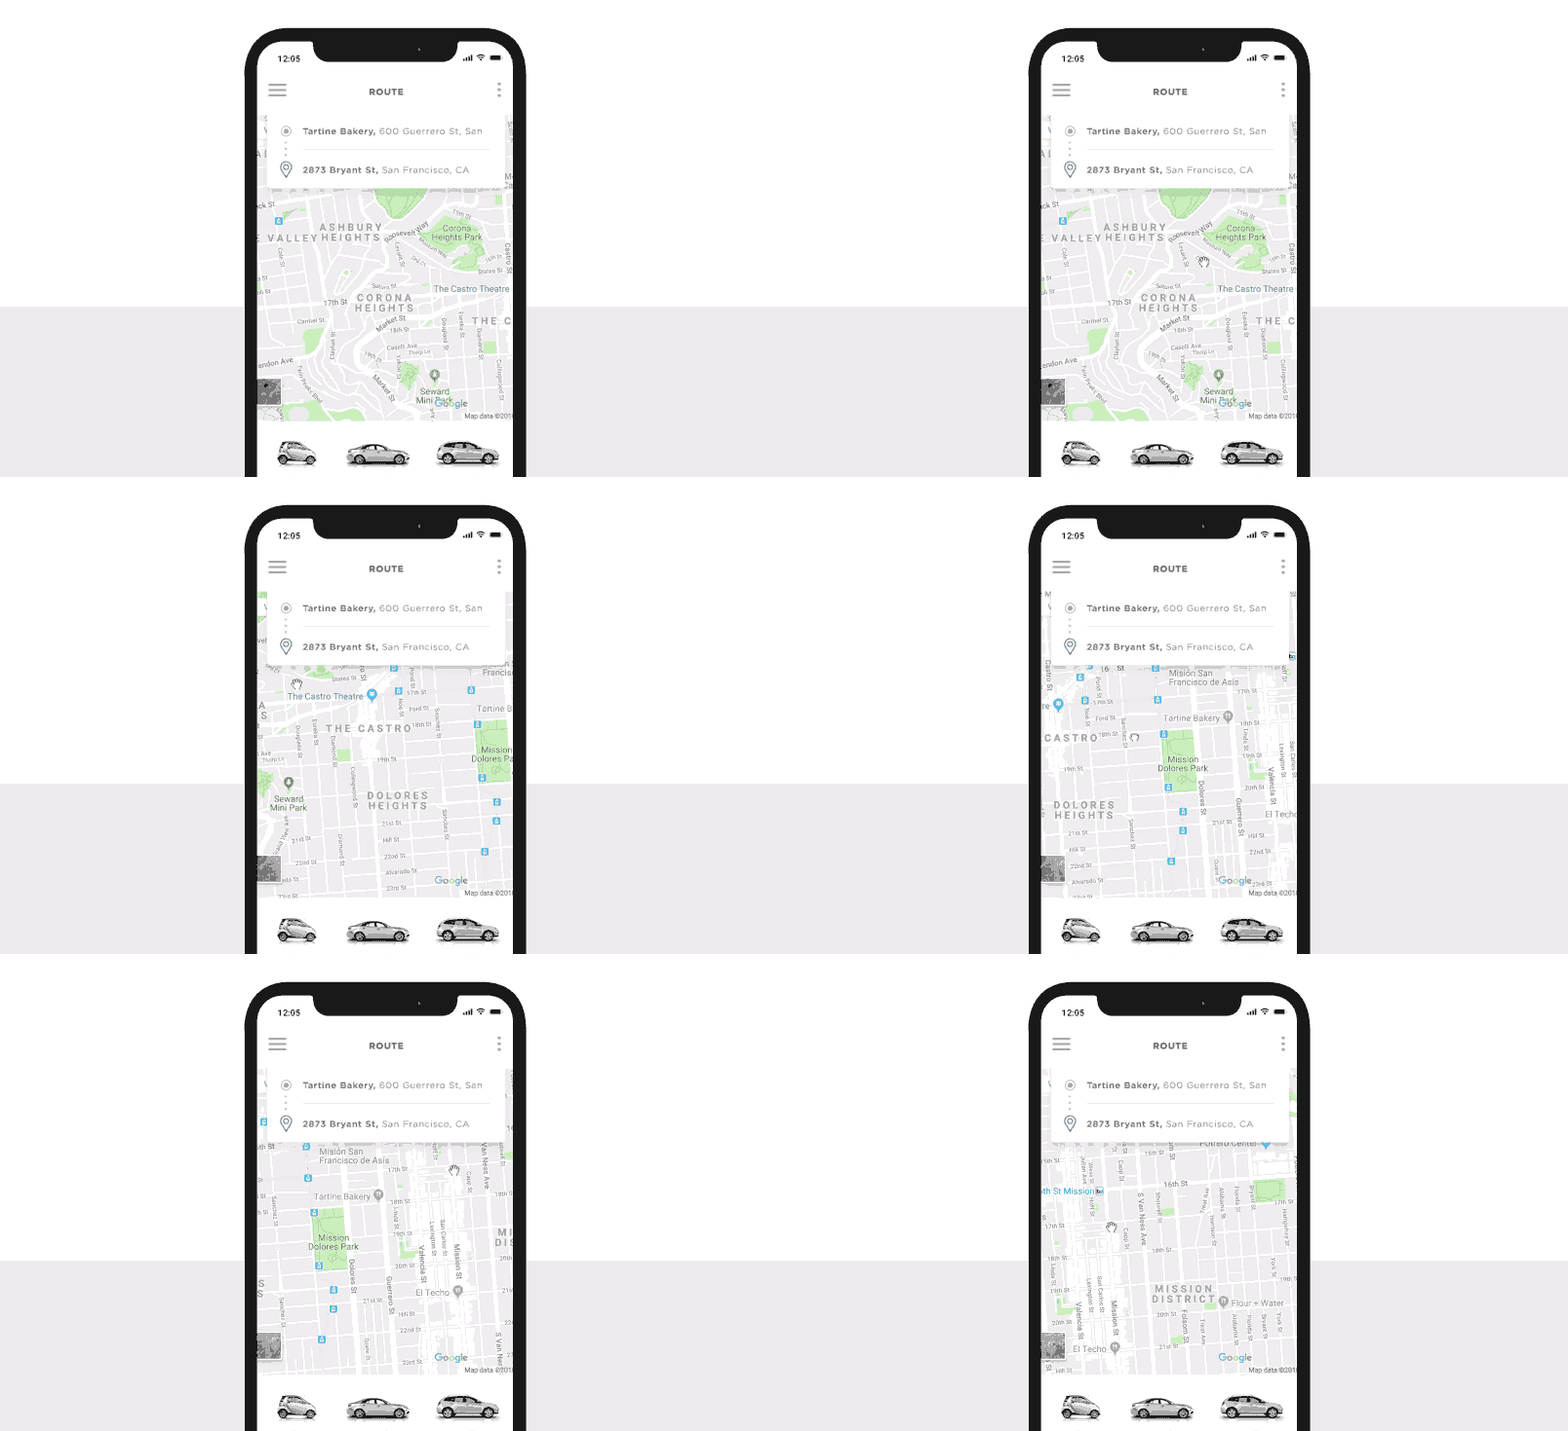
Drag a dynamic panel to your Book a Cab screen and resize it to the width of the screen. Drag the HTML widget from the palette onto your canvas and resize it. Make the HTML widget double the size of the dynamic panel. This is to ensure users can drag the map around.
In the Properties palette, you’ll see an HTML field. We need to add HTML here from Google Maps.
Go to Google Maps and find an area you wish to display on your map. In the top-left-hand corner of Google Maps is a hamburger menu. Open it and look for ‘Share or embed map’.
Under the Embed a map tab, you’ll find HTML that you can copy. Copy that and put it in the HTML field in the Properties palette in Justinmind.
When you paste the code, a message will appear in the widget about using an unsupported browser. Ignore this. When you simulate the app, the map will show as expected.
Step six: Create a realistic price slider
Is a ride-sharing app complete without the choice to ride in a luxury Mercedes? Probably not. Let’s add a price slider so users have the option of which car they want to ride in.
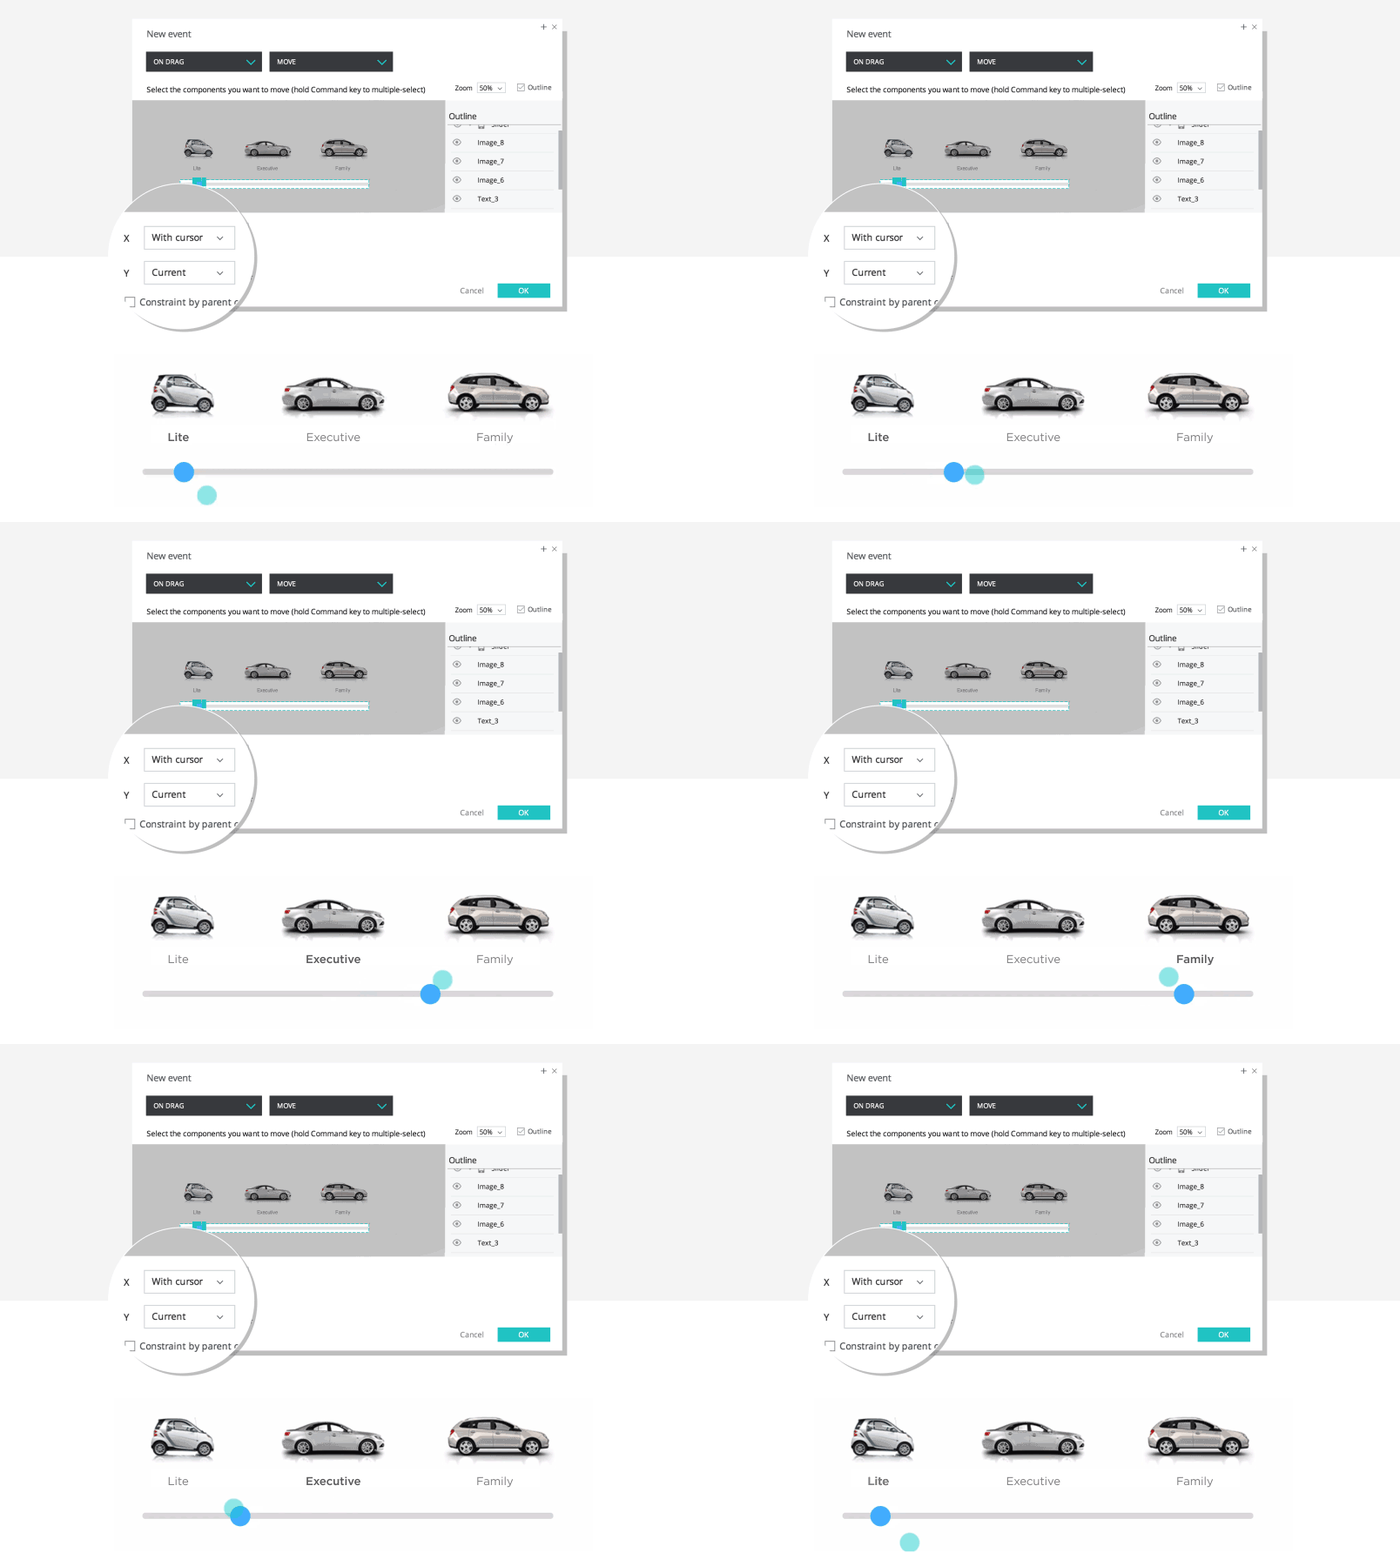
In our example, there are 3 options: Lite for the solo traveler, Executive for those who like to splash the cash and Family for big groups.
Make sure you’re on the Book a Cab screen you made earlier. Drag a rectangle onto the canvas, then resize and color it to your own preferences. Use the Image widget and add an image of the customer slider icon. Right-click and group the rectangle and the image widget together.
To make it slide left and right, you have to add an “On Drag” + “Move” event. Click Add Event in the Events palette, and a Dialog will pop up. Create an “On Drag” + “Move” event from the drop-down options at the top of the Dialog. At the foot of the Dialog you’ll see X and Y options. In the X field, choose With cursor and in the Y field, choose Current. Now you’ve got your slider.
Step seven: Let users review their driver
Reviews are a big part of ride-sharing apps. They tell you whether your driver is doing a good job. With Justinmind you can prototype starred review systems hat really add something to the user experience for ride-sharers.
In our example, you can toggle the number of stars you want to give. You can find a star image online or download our iOS Icon widget library, which contains a ready-made star widget.
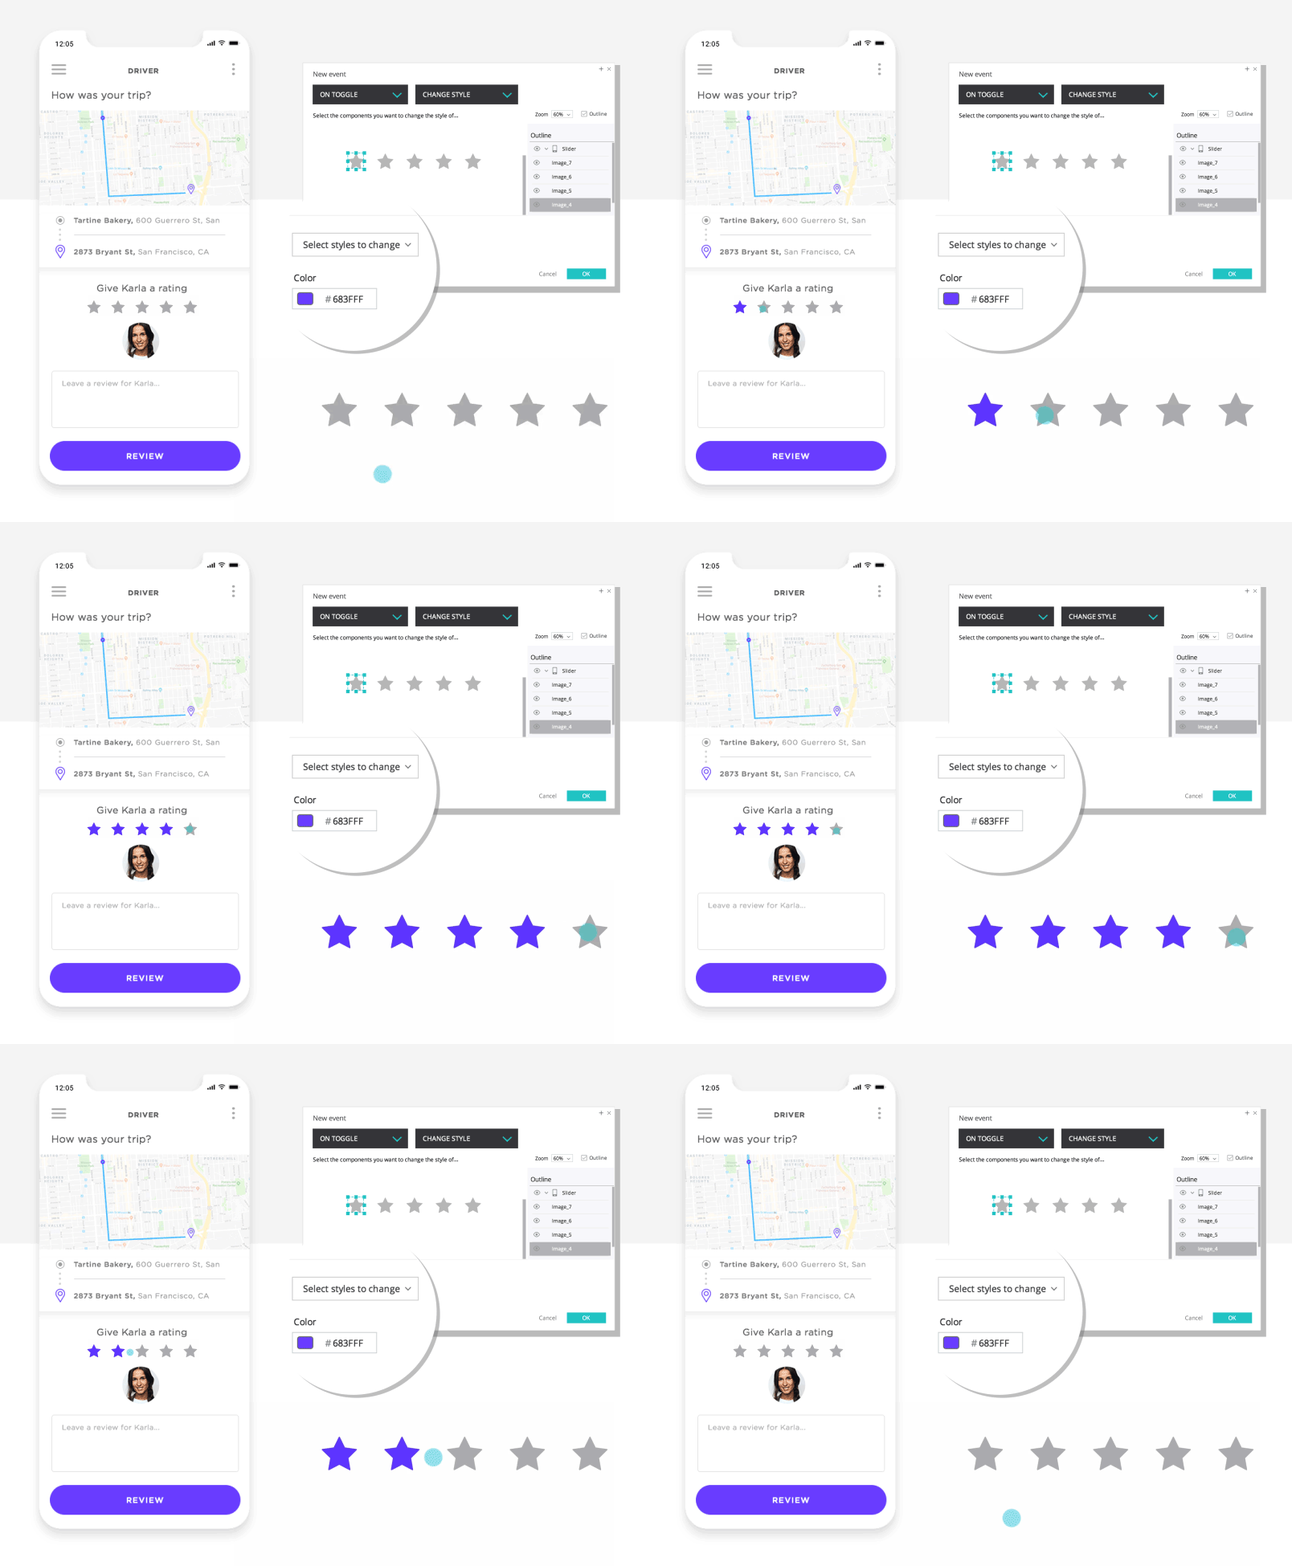
Now we’re going to add Events so that the stars change color when selected by app users. Select the review screen you made earlier. Place 5 stars on your canvas. Click on one of the stars you just placed and click Add Event. In the Dialog, add an “On Toggle” + “Change Style” event. You want to change color. IWe chose puple for our stars. Click OK.
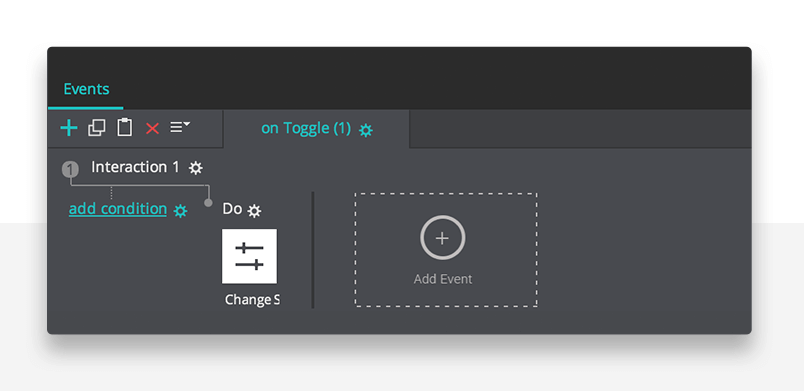
To repeat this action for the next five stars, click your original star. Click the Copy all events icon which sits just next to the ‘+’ icon in the Events palette. Click the next star in the lineup and click the Paste all events icon (the clipboard icon). Do this for the remaining stars.
Step eight: Help your users with useful tooltips
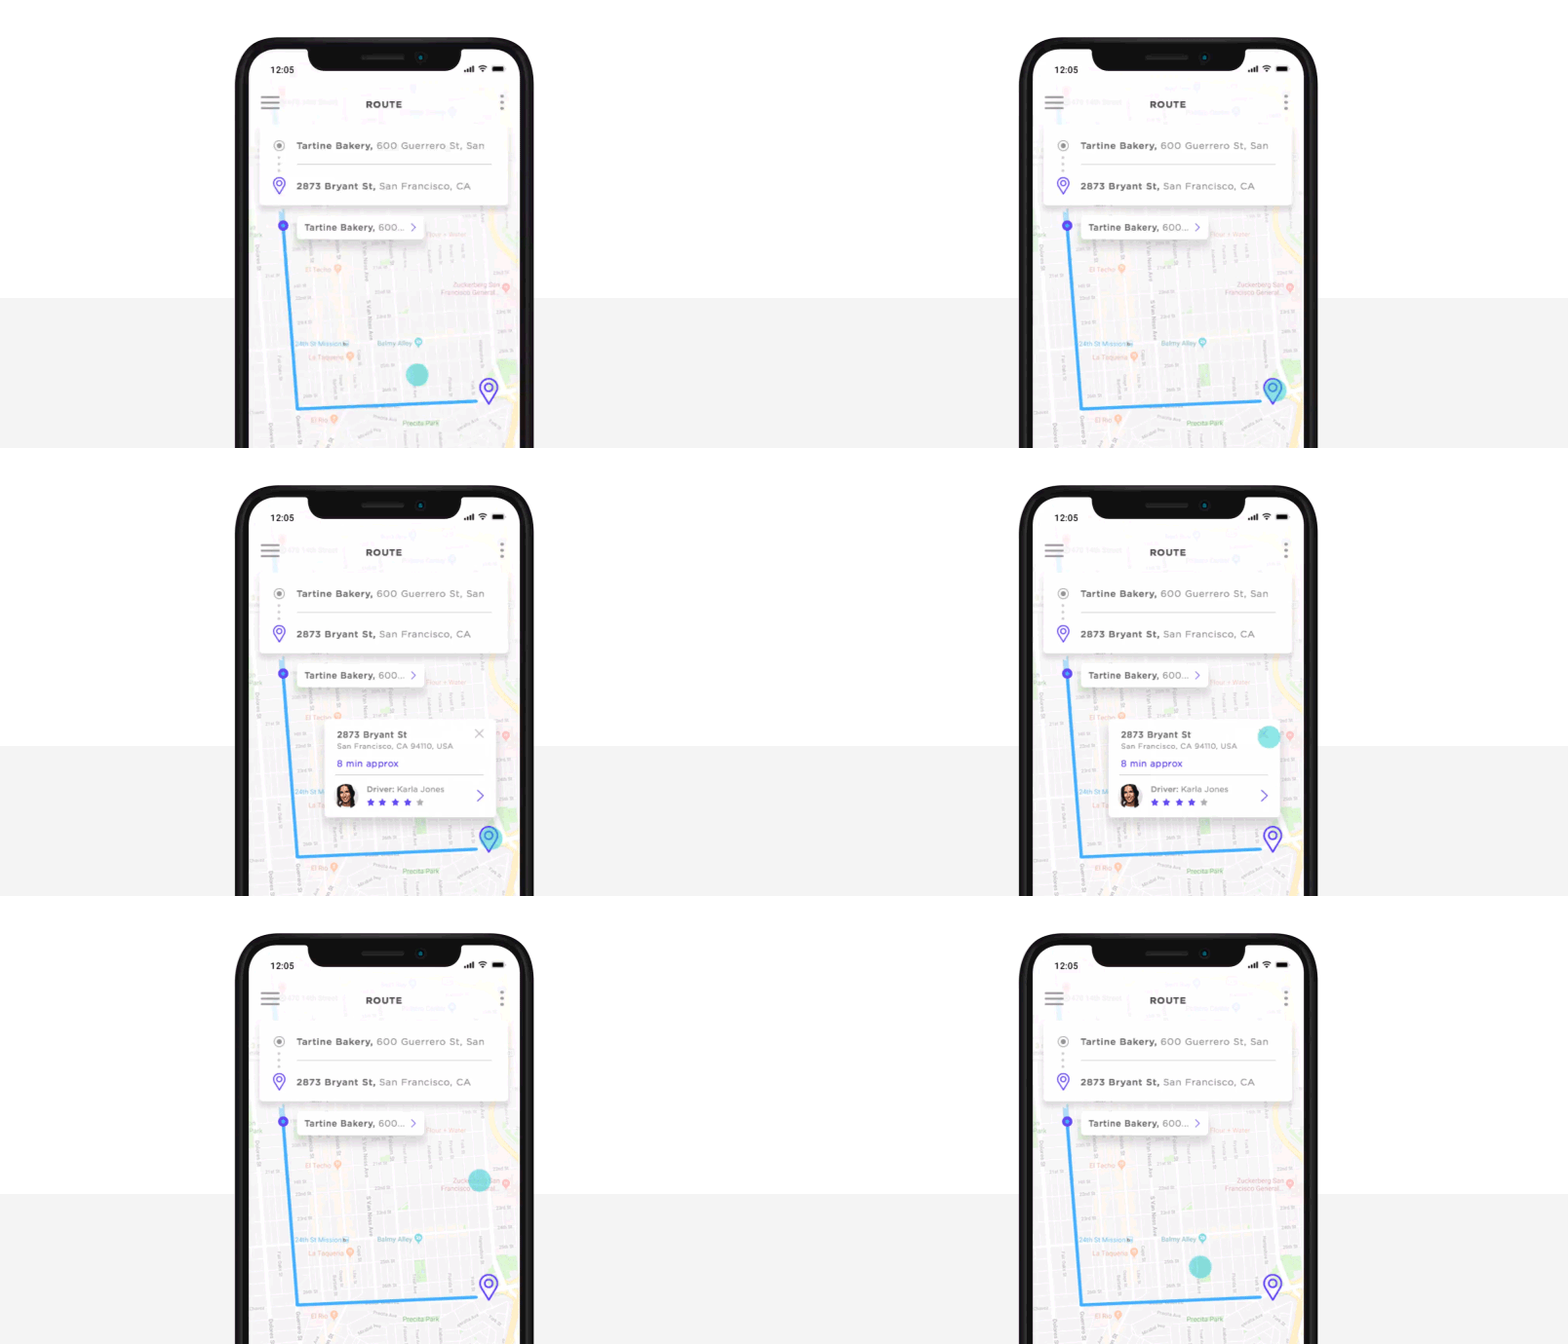
When a user clicks on a point on the map, we want a tool tip to appear. In our example, we want a user to click on an icon on the map to show information about the driver and their precise location.
Place a Pinpoint widget icon (we have a Pinpoint icon in our iOS library) on your map to represent the location of a driver.
Create your tooltip by using a Call Out widget. Make sure to add an ‘X’ to the corner of the tooltip so users can close it. Group these two widgets together and make sure “Hide component” is selected from the Properties palette.
On the pin you placed on the canvas, add an “On Tap” + “Show” Event. Select the tooltip. Click OK. Now add another Event. This time “On Tap” + “Hide” but only select the ‘X’.
Step nine: Create smooth transitions between screens
Your splash screen is an opportunity to show personality. But it’s also a great chance to prototype smooth transitions between your screens. If you need a bit more inspiration, check out this awesome list of great splash screens.
If it’s not smooth, it’s rough. And rough experiences are barely memorable.
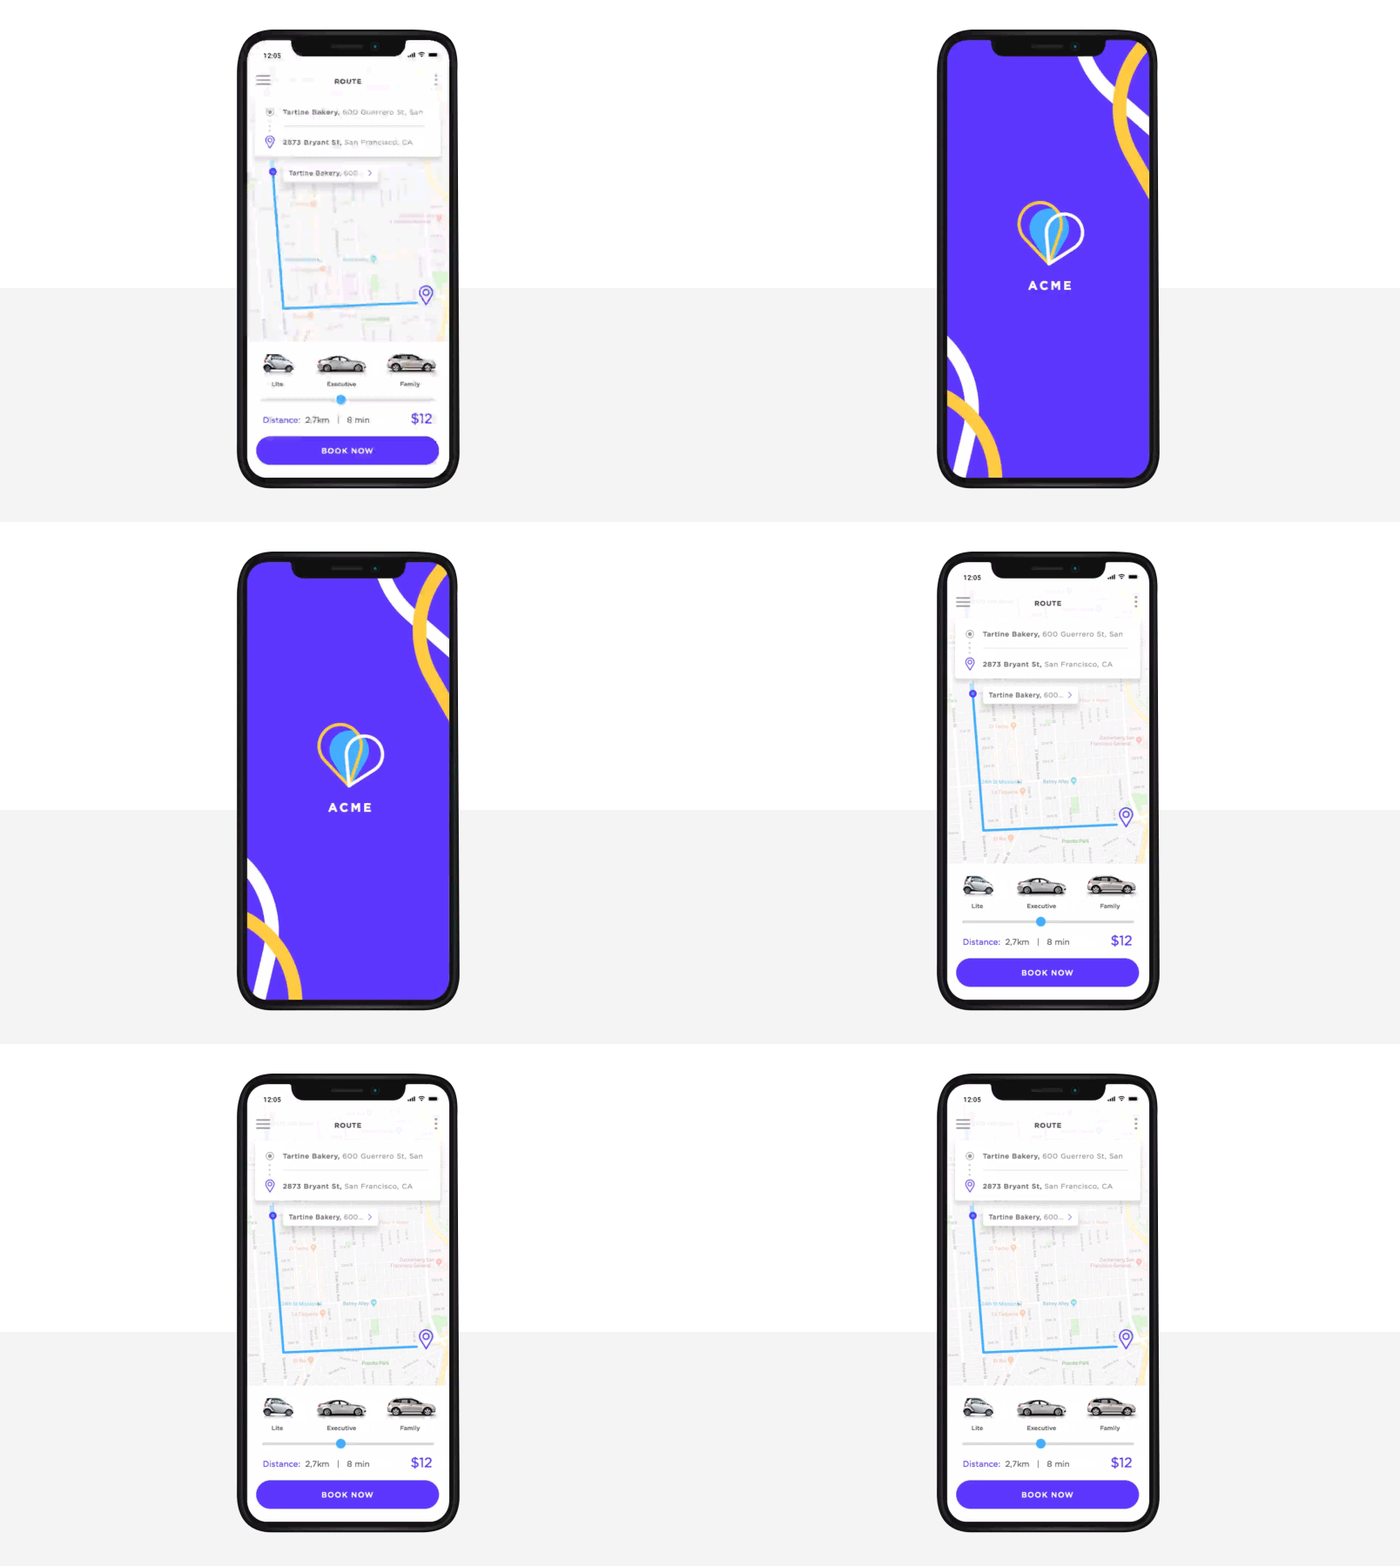
Let’s create the transition.
In the Screens palette, select your first screen. Add an “On Page Load” + “Pause” event. The pause should be around 1000 milliseconds. Any longer and you risk using up your users’ patience. Add another Event, this time choose “On Page Load” + “Link to” and select your home screen.
Between your events, you’ll see a diamond-shaped icon. Click this and make sure the “Link to” event comes after the first event you created.
Simulate and you’re done! Bravo. 🙂
Want to keep prototyping? Check out this awesome tutorial on how to prototype a grocery app in 7 simple steps.
Related Content
 Why should you use user personas and how do you create them? Get all the steps to build one, as well as a great example and a list of user persona generators!15 min Read
 UX design books that cover everything from layout design to the theory of user testing. Want to expand your horizons? Check out this awesome list!9 min Read
 UX design portfolios are your chance to showcase your top skills and best work. Check out this post for awesome portfolio examples and websites!10 min Read


